
Creating and Managing a Document Deadline
Part of what simplifies an eSignature workflow is the ability to set a document deadline and improve the odds of completing deals on time! This page gives you a step-by-step on how to set up a document deadline, as well as monitoring the deadlines as it reaches expiration.
Setting Up a Document Deadline
When you’re creating electronic signature documents, adding a document deadline is very simple. Begin by starting a New Document using the +New button in the Dashboard.
Begin by Uploading a document for signature, and then edit your Recipients. Set any Recipient settings you may want and edit your invitation email message.
Now, on the Editor page, click Settings in the top left next to the Document Title and go to the Notification page.
![]()
Here, you can set reminder emails, what the final email looks like, copy someone for all the notification emails, and most importantly (for this article), set Document Deadlines. Make sure you also indicate when to warn the signer of the expiration.
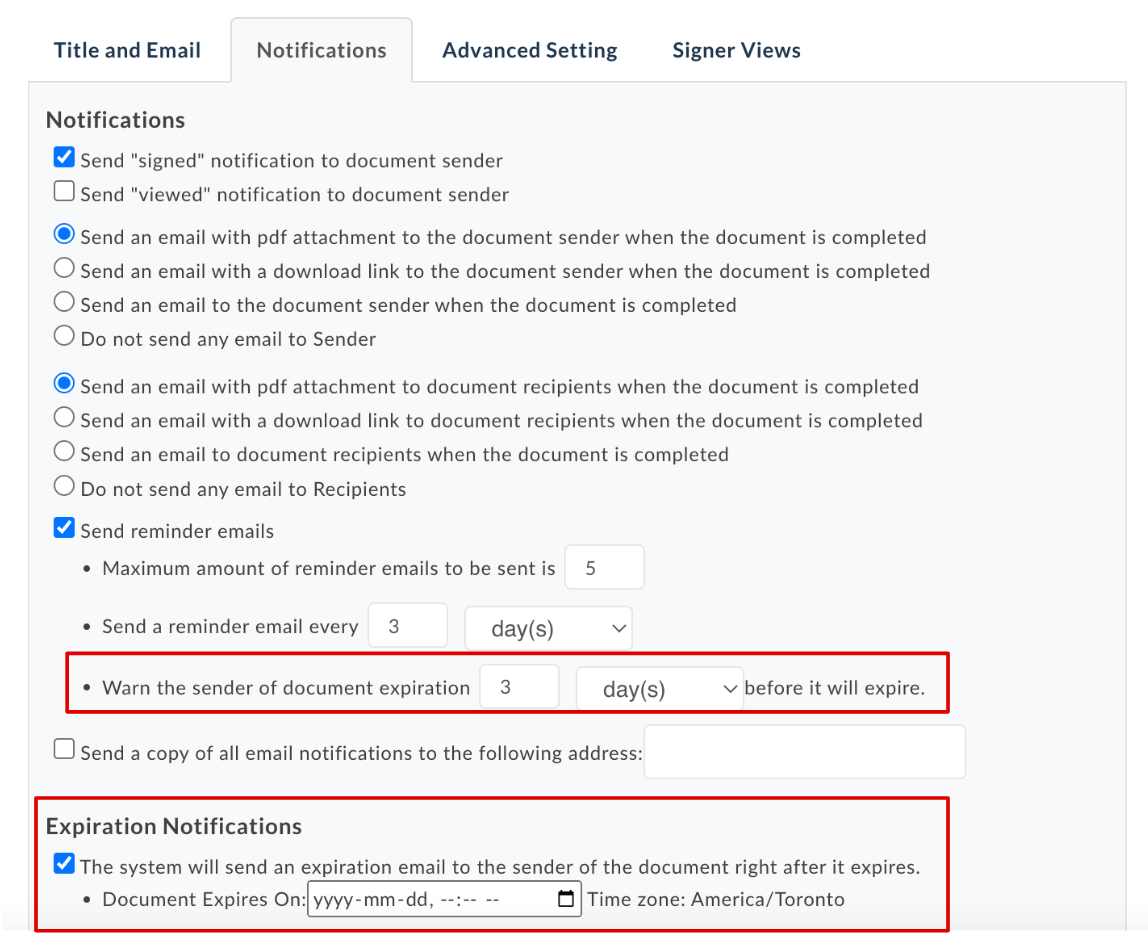
By default, documents in Signority expire after 180 days, but you can change this as well. You can learn how to change the default expiration and automatic reminder schedule here.
Monitoring a Document Deadline
After you send out a document, you can view documents that will soon expire in the Document page. Click on the Status header and filter by Documents Expiring Within a Week. Documents shown will be listed as In Progress.
We strongly recommend resending documents and making sure you sent it to the right email if it ever gets to that point. You can also directly contact the signers to remind them in case the automatic reminders are being ignored or lost.
Further Readings
Creating Your Default Signature Design
Customizing Company Branding Settings
Using Page View Evidence for Sensitive Documents