
Creating A Signing Order for Your Documents
By default, Signority sends the document to everyone all at once, and they can sign as soon as you send the document. However, if your document has a specific workflow that people need to sign in, you can create a Signing Order to send out signing invitations in a specific sequence.
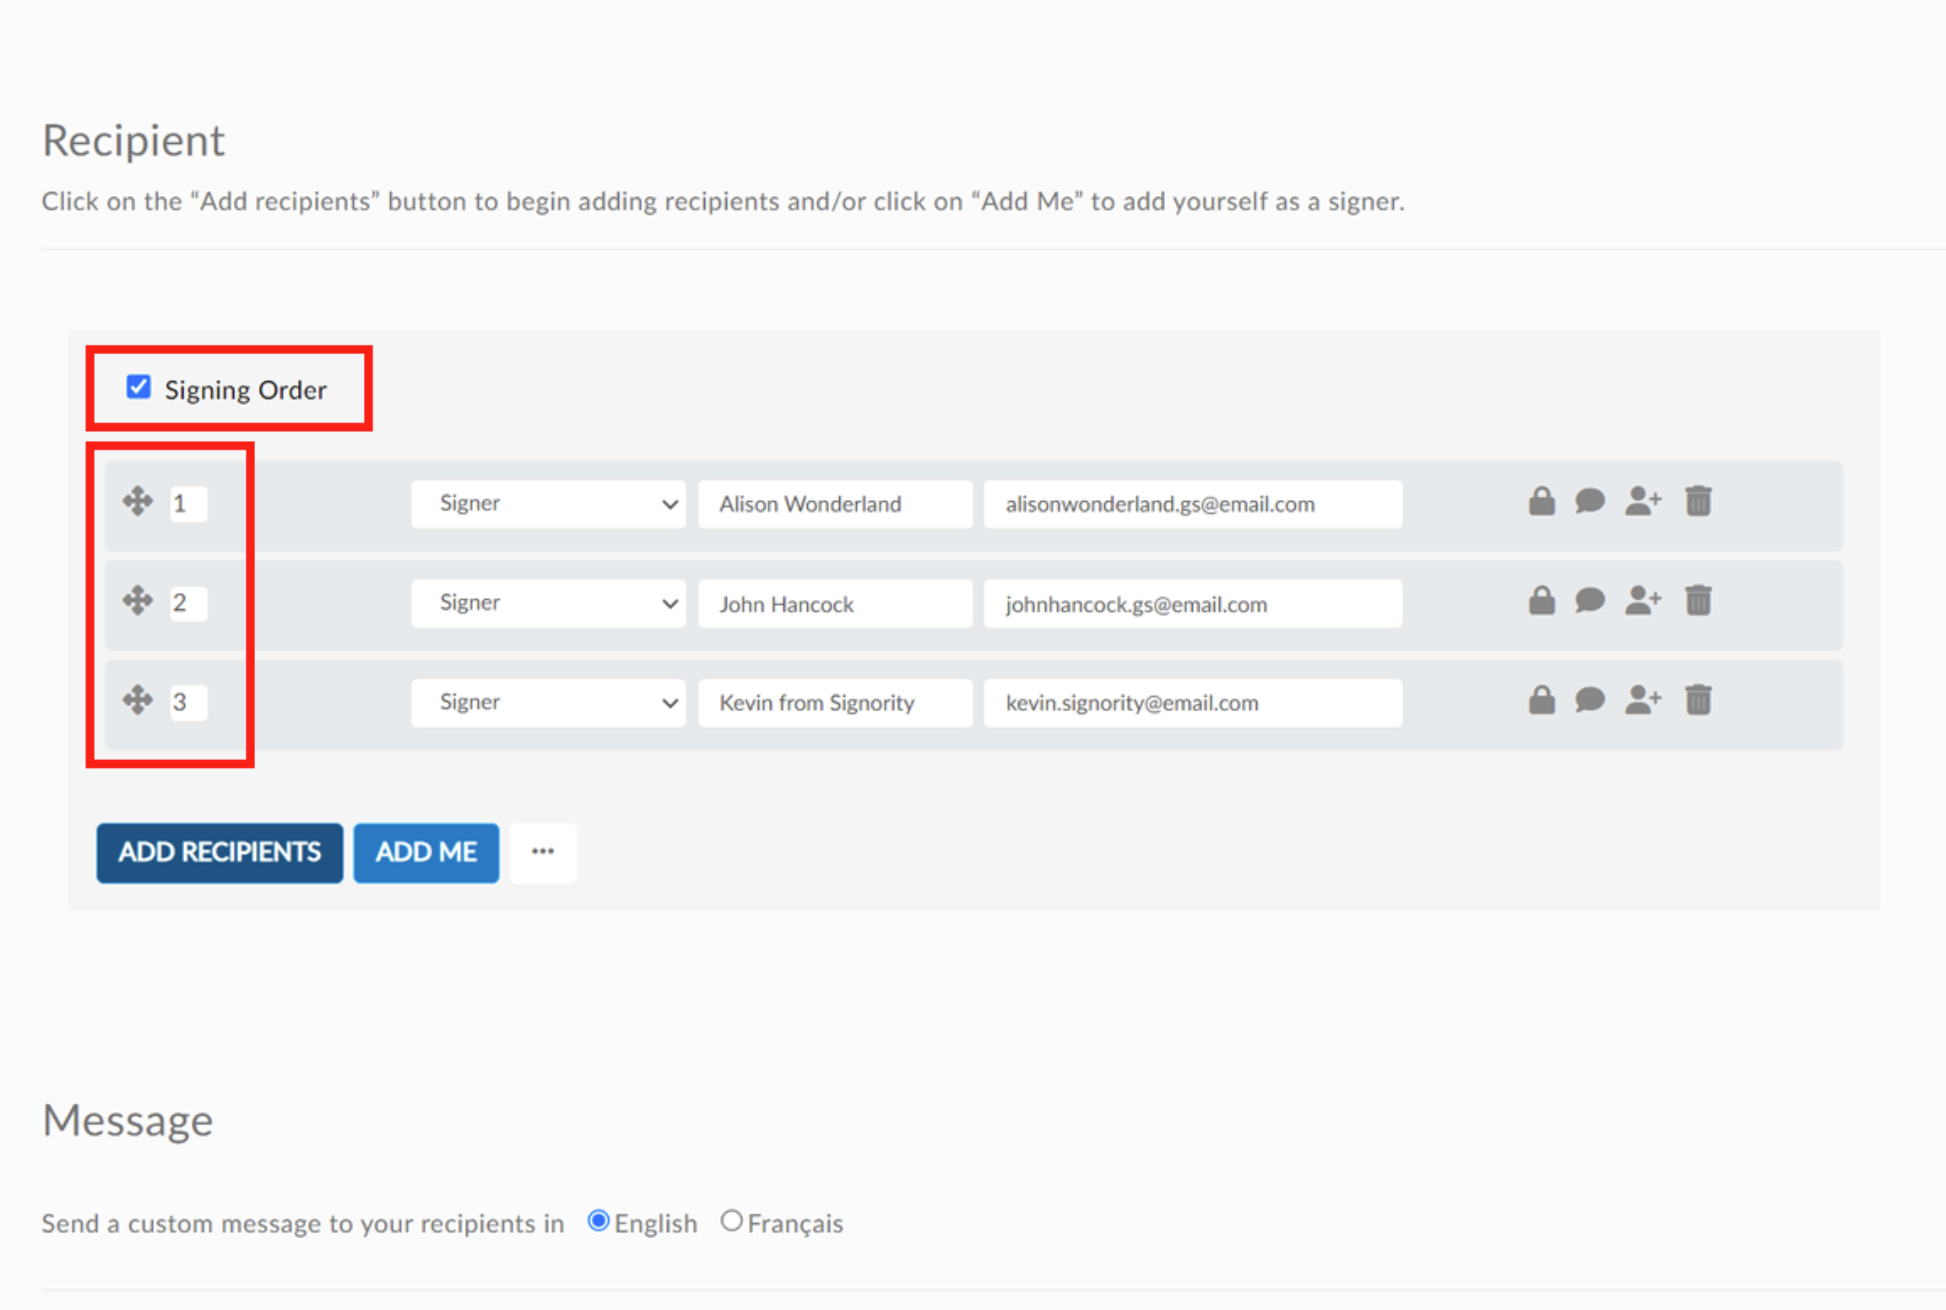
Setting Up a Signing Order
The process for sending the document out is the same as how you create electronic signature documents, just with a few changes.
- Begin by creating a New Document using the +New button.
- Upload the document that has a specific signing order.
- On the Recipients page, add the appropriate number of signers needed.
- Click Signing Order to create a sequence.
- Drag & sort the recipients in the correct order, or set their signing order number manually.
 When you’re done, move to the Editor page and add the Tags needed. Assign tags to the right signers. Once completed, click Next to send the document.
In the example above, the workflow goes in the following sequence:
- Alison Wonderland receives the invitation first. When she completes the signing process, John Hancock will receive their invitation. When he submits the document, Kevin from Signority will be the last signer and receive their email.
When a sequence is created, invitation emails will only send after the previous person in the sequence completes their signing.
Note: You can allow multiple people to sign at the same step, just give them the same signing order number. For e.g. if Kevin from Signority, in the example above, was set to the 2nd signer as well as John Hancock, but John and Kevin will receive the invitation email simultaneously after Alison Wonderland submits her signature.
When a signing order is used, recipients who aren’t able to sign yet will be listed as “Invitation not Sent” in the Recipient List Page.
Customize Signing Order When A Recipient Rejects the Document
Role(s): Individual User, Team Admin, Super Admin
By default, if a recipient rejects the document, Signority will automatically continue the workflow by sending the document to the next recipient. However, you can also choose to cancel the document and choose if you want to send an email notifying the signers or not.
- To do this, open Global Settings (For team admins this is in the admin console under Settings)
- Under Signer Options select the dropdown for “Signing flow behavior when a recipient rejects:”

- Choose what workflow you would like to happen if a recipient rejects the document
- Continue with signing flow
- Cancel the document and send an email notifying the signers
- Cancel the document and do not send an email to the signers
- Select Save
Note: When “Cancel the document….” is chosen, the cancellation reason will be automatically generated as “Rejected by {{email of recipient}}”
Further Reading
Switch Signer Responsibility to Another Person as a Recipient
Sign Documents Online as a Recipient
Change Signers and Resend Invitation Emails