Electronic Seal
Available with: Custom Plans Role(s): Team Admin, Super Admin
Electronic Seals give a recipient the authority to place an electronic seal on the document that represents your organization’s department.
Adding an Electronic Seal
- Navigate to the Admin Console, and under the settings dropdown on the left navigation menu, go to the Seals page.
- Select the Add Seal button to bring up the Add Seal pop-up.
- Add the following settings:
-
- Name: Name of the electronic seal
- Email: The email of the person which the seal is associated with
- Password: Password will be entered by the electronic seal recipient for the seal to be applied
- Graphic:
- File: PNG or JPEG of the electronic seal
- Display Subject: Seal Name
- Display Date: Date that the seal is applied
- Display Time: Time that the seal is applied
- Display Reason: Reason for seal being applied
- Users/Teams: Select the users/teams that can add the electronic seal to their documents

-
- Click OK when you are done.
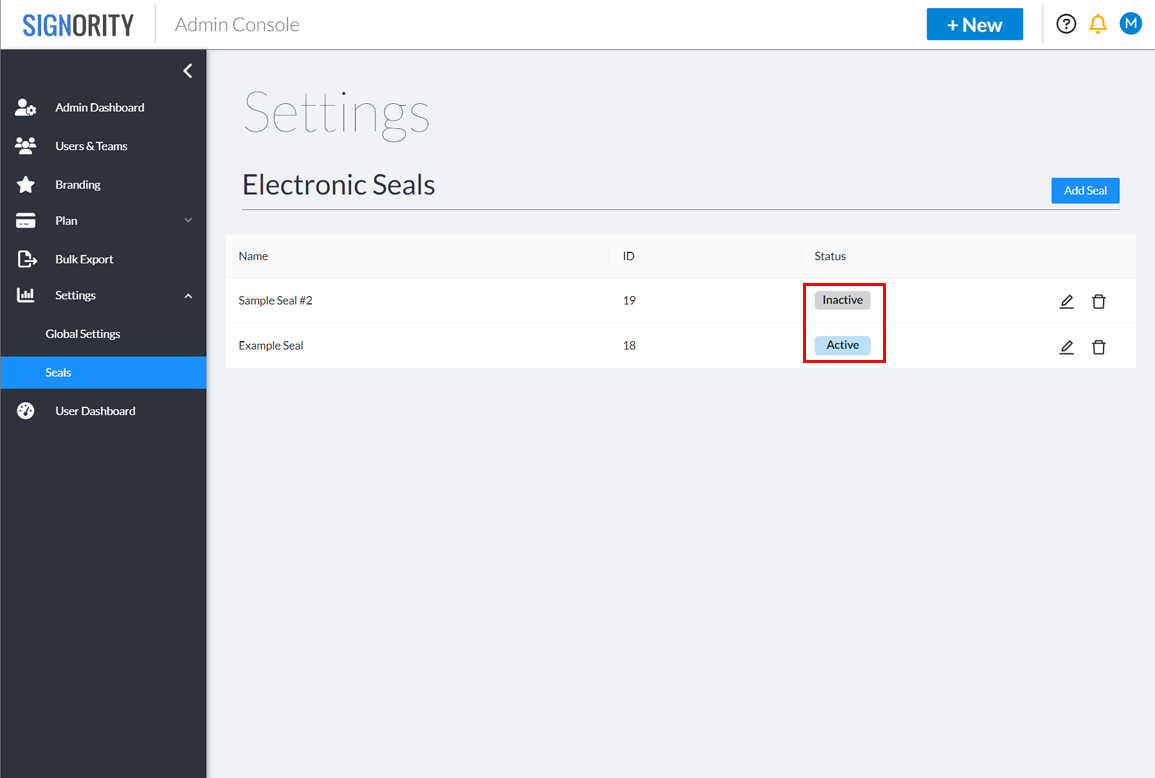
The seal will now appear on the Electronic Seals page. To edit the Seal, click the pen icon button to the right of the seal.
Activating/Deactivating Electronic Seals
Electronic seals are automatically active once they are made. However, if you wish to deactivate or reactivate them, you can do so by clicking on the “Active” or “Inactive” Buttons under the Status column on the Electronic Seals page.
Adding an Electronic Seal
- Begin by creating a new document, then upload your documents or go straight to the add recipients page.
- On the recipient’s page, select the Electronic Seal button.
- Using the dropdown, select which electronic seal you wish to use.
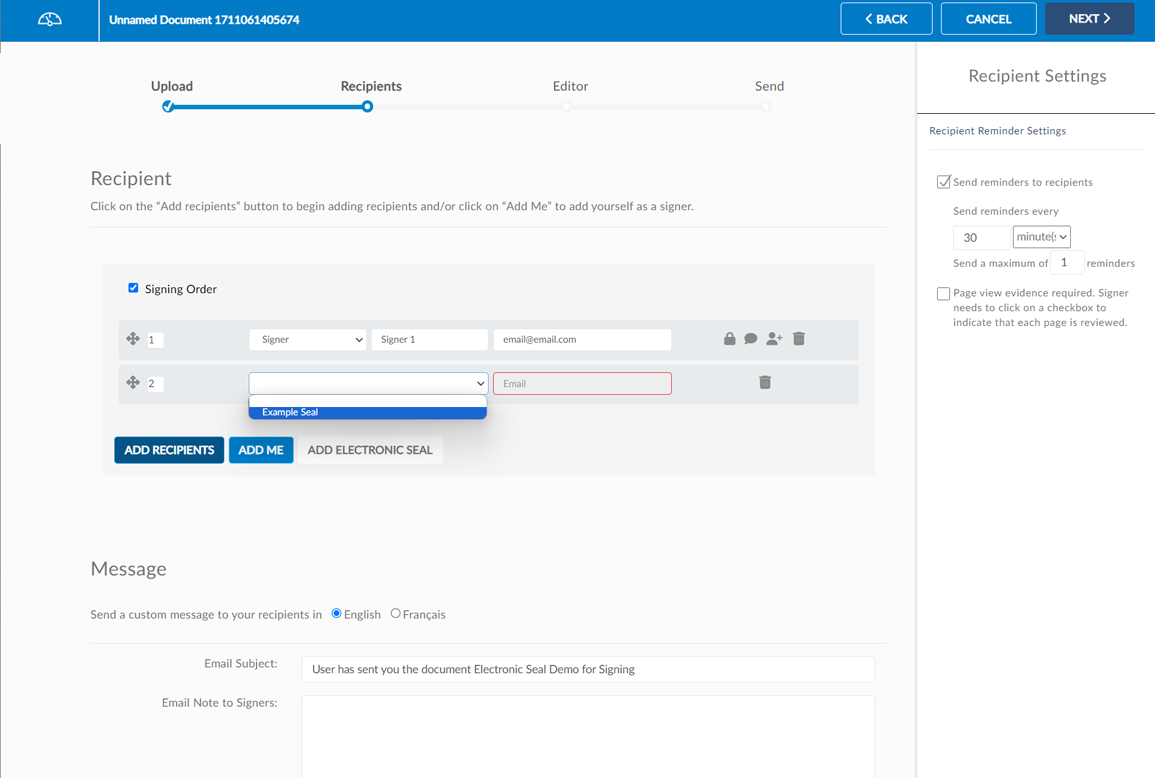
- Add the rest of your recipients and then proceed to the document editor page.
- Select the electronic seal recipient on the left menu, and the Electronic Seal tag will appear.
- Drag and drop the Electronic Seal onto your document.
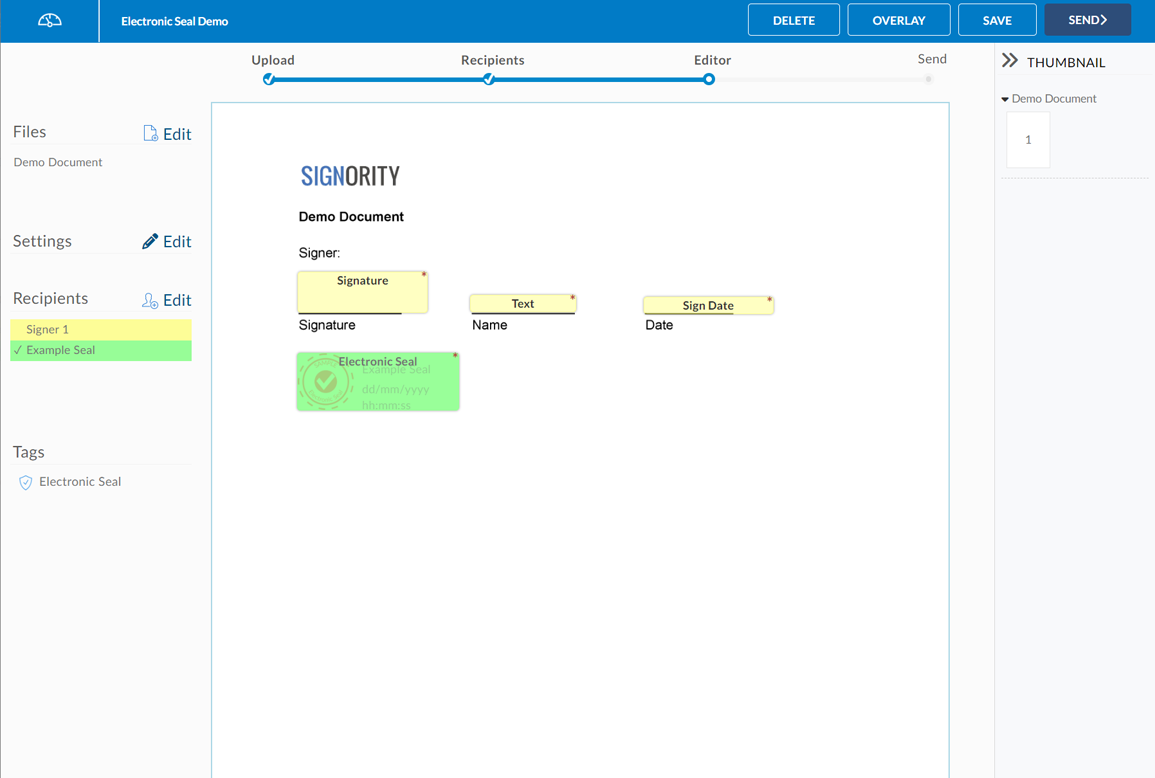
Note: An overlay of the Electronic Seal will appear to show how the seal will look once it is applied - Finish setting up your document and then click Send.
The email associated with the electronic seal will be sent an email when the document is ready for them to apply the seal.
Applying an Electronic Seal
- Open the document for signature.
- On the “Document for your Secure Access” popup, enter the password for the electronic seal.

- Agree to the terms of use and click next.
- Click on the Electonic Seal tag to stamp the seal.
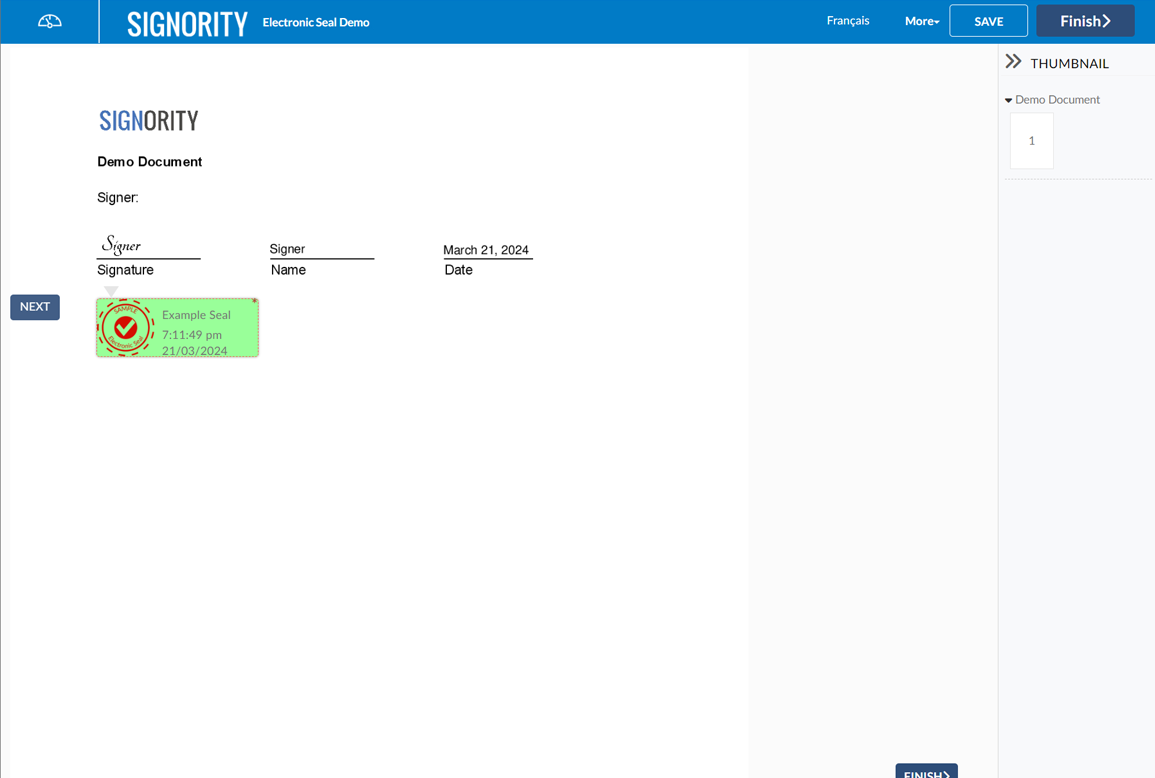
- Click Finish.