Team Settings Overview
Available with: Team Plans Role: Team Admin
This tutorial will introduce you to the Team Settings available to you as a Team Admin. Any changes you make to these settings will take place on a team level, affecting your team and any sub-teams in your group.
To get to your settings page as a Team Admin you can view the Team Settings in your Admin Console (Admin Dashboard). Click on Admin in your sidebar menu. If Admin is at the top of your menu then you are already in your Admin Console.

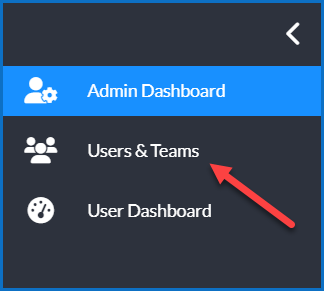
For Team Settings you have to go into the Users & Teams page. Click on the Users & Teams option in your sidebar menu. If your menu is collapsed you should click on the Icon of three people that is in the menu below.
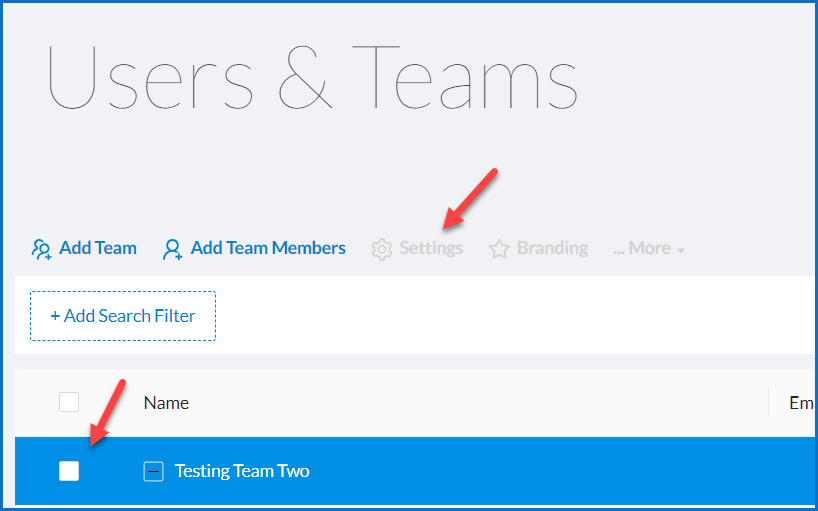
Once in the Users & Team page you will see that the Settings option is grayed out. This is because you have not yet chosen a team to apply any setting changes to.
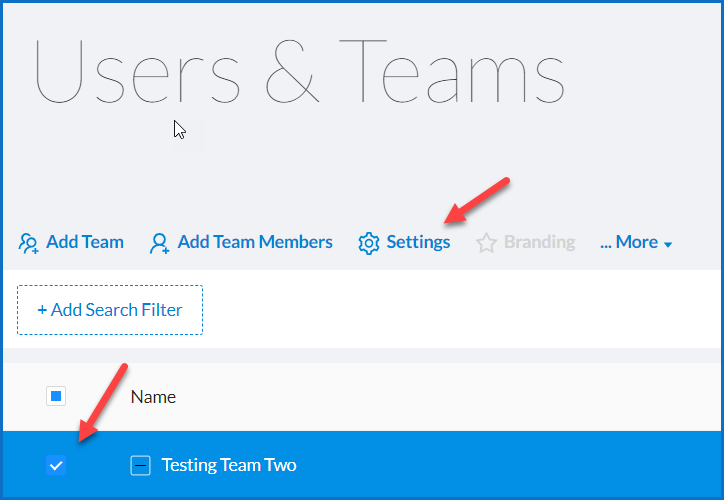
Once you choose a team you will notice that the Settings option turns blue and is accessible.
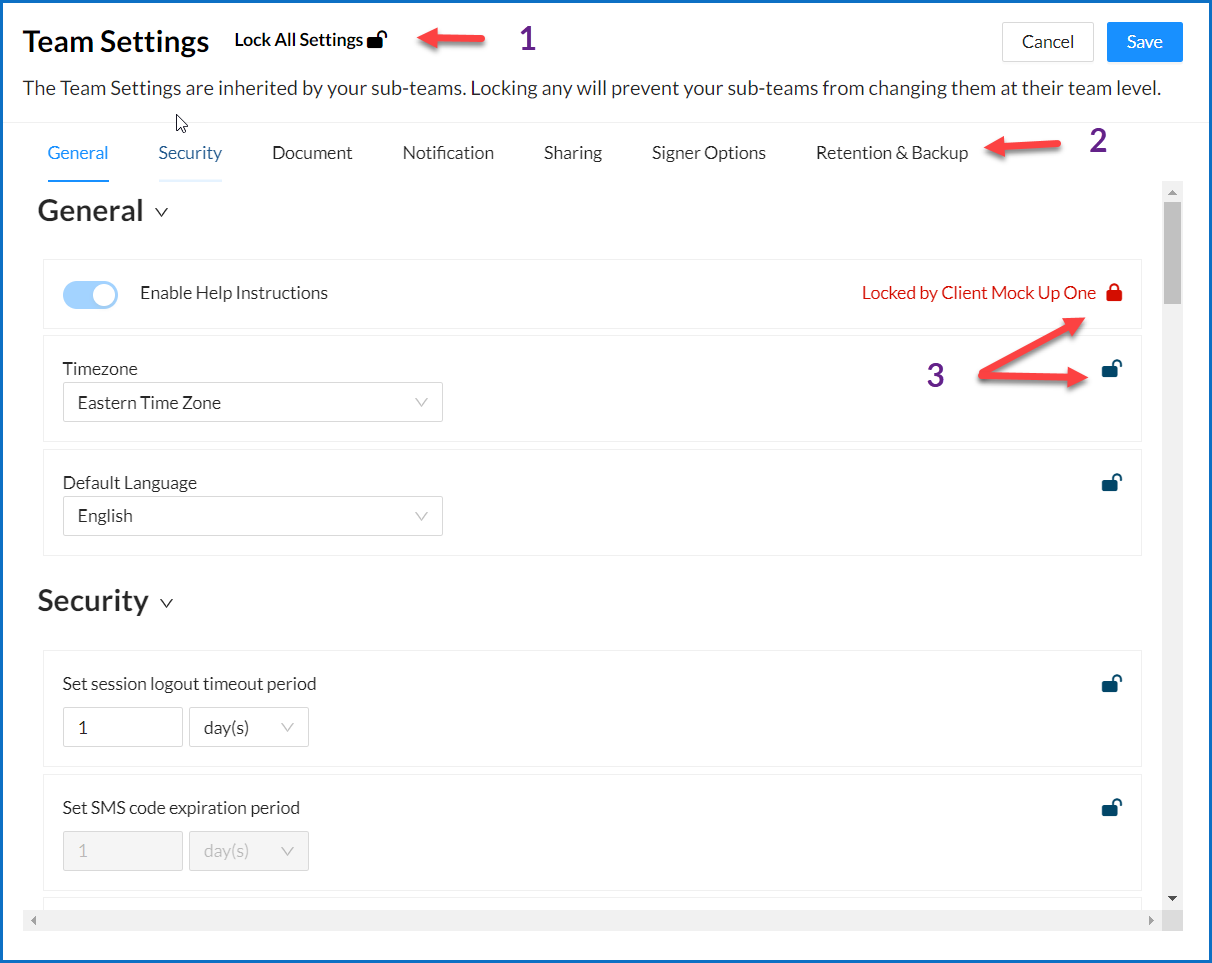
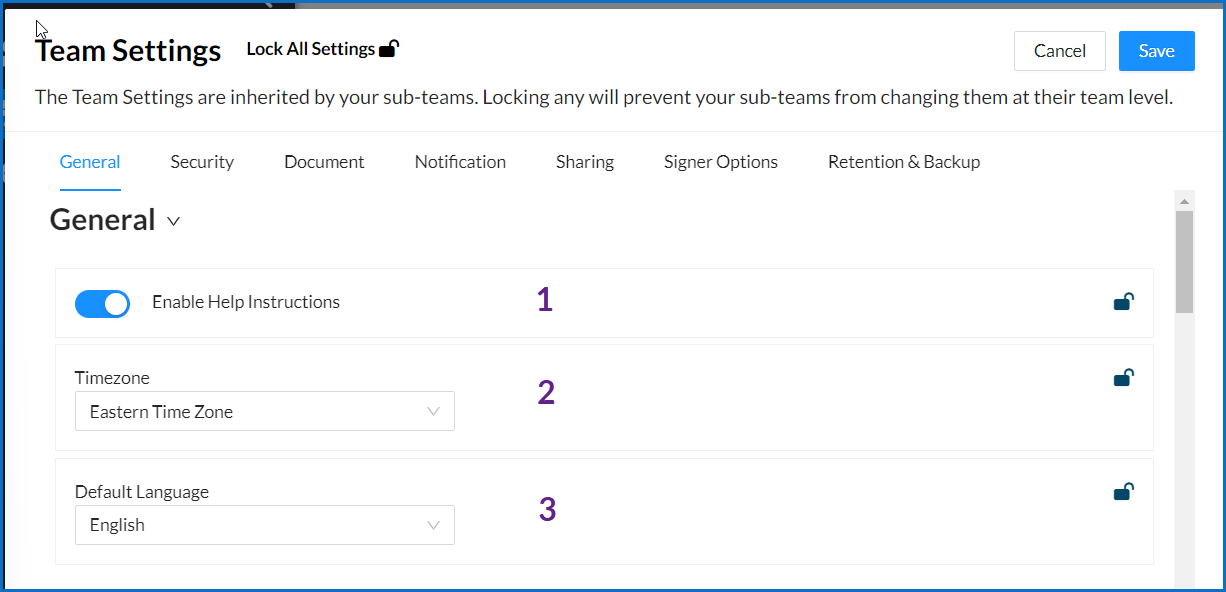
When you click on Settings in the menu, you will see the Team Settings window appear. There are 3 things you should take notice of first.
- The ability to lock ALL settings
- The menu at the top that will let you jump to each Setting category. As a Team Admin you may change the default settings in each of these sections.
- The little locks beside each setting. Use these locks to secure the setting you have set and make it unchangeable.
- The first arrow points to the Help Instructions setting, it is turned on and locked. No one may override this setting unless they are another Team Admin who may unlock it.
- The second arrow points to the Time Zone setting. The Eastern Time Zone is set as the default for everyone’s account. However, because it is unlocked users and Team Admins may override this and set their own time zone. A Team Admin may, for their teams, lock the time zone to whichever time zone they choose.
General Settings
The General Settings include:
- Enable Help Instructions
- Time Zone
- Default Language
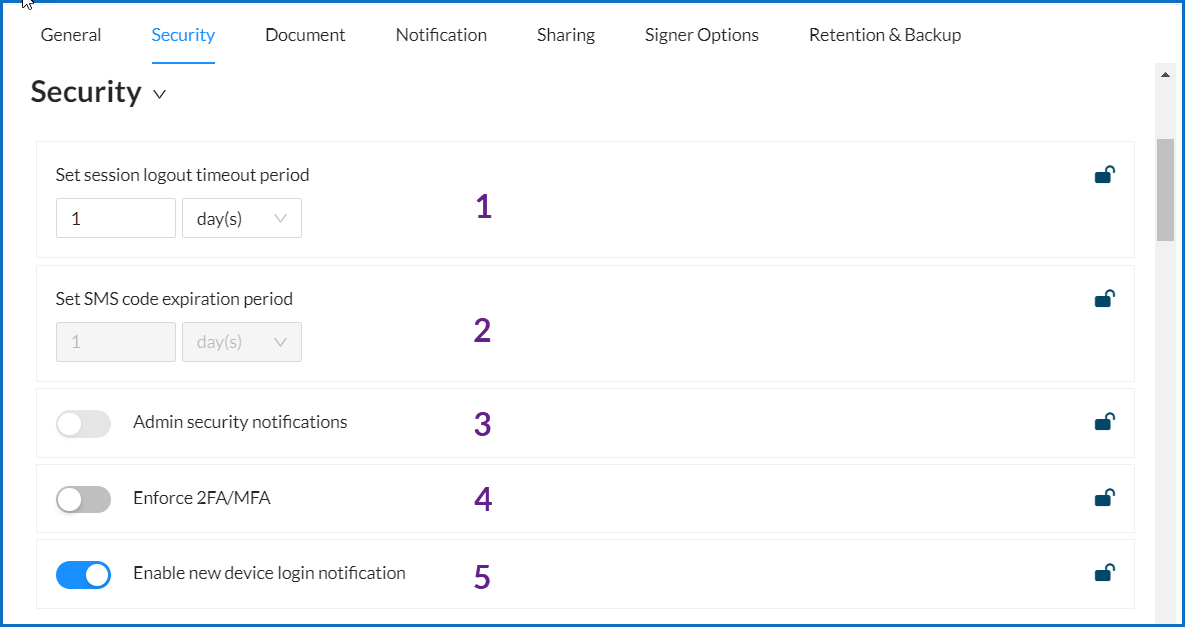
Security Settings
Here you can set security settings for your team and sub-teams.
These settings include:
- Session logout time
- Expiration timing for SMS code
- Admin Security Notifications
- Enforce 2FA/MFA for your users
- Enable/disable new device login notifications
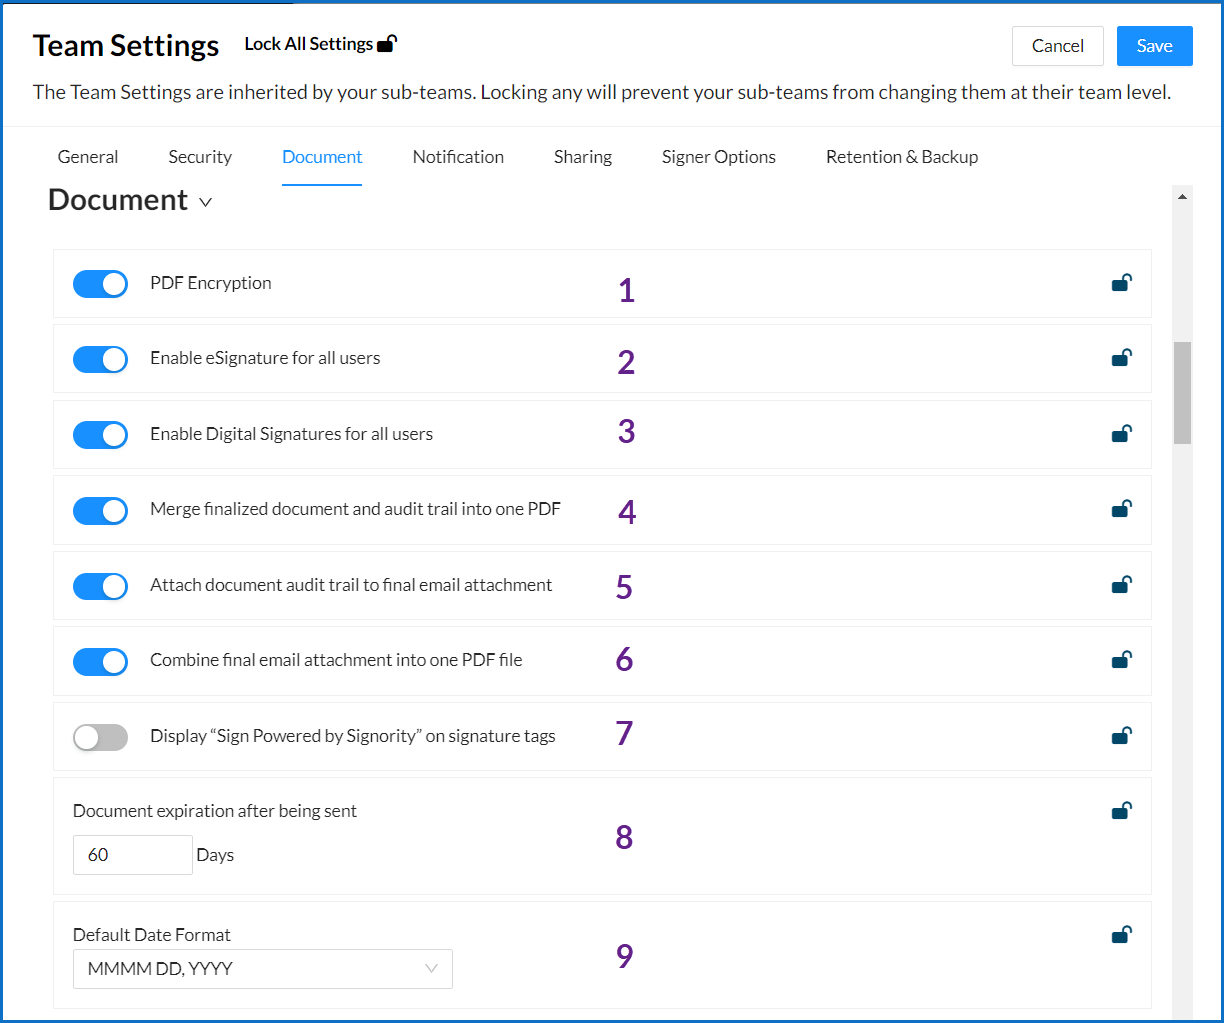
Document Settings
In the Document Settings section you can enable such settings as:
- PDF Encryption
- eSignatures for all users
- Digital Signatures for all users
- Merge finalized documents and audit trail into one PDF document
- Attach document’s audit trail to final email attachment
- Combine final email attachment into one PDF file
- Display “Signature Powered by Signority” on Signature tags
- Set a document expiration date
- Set a default date format
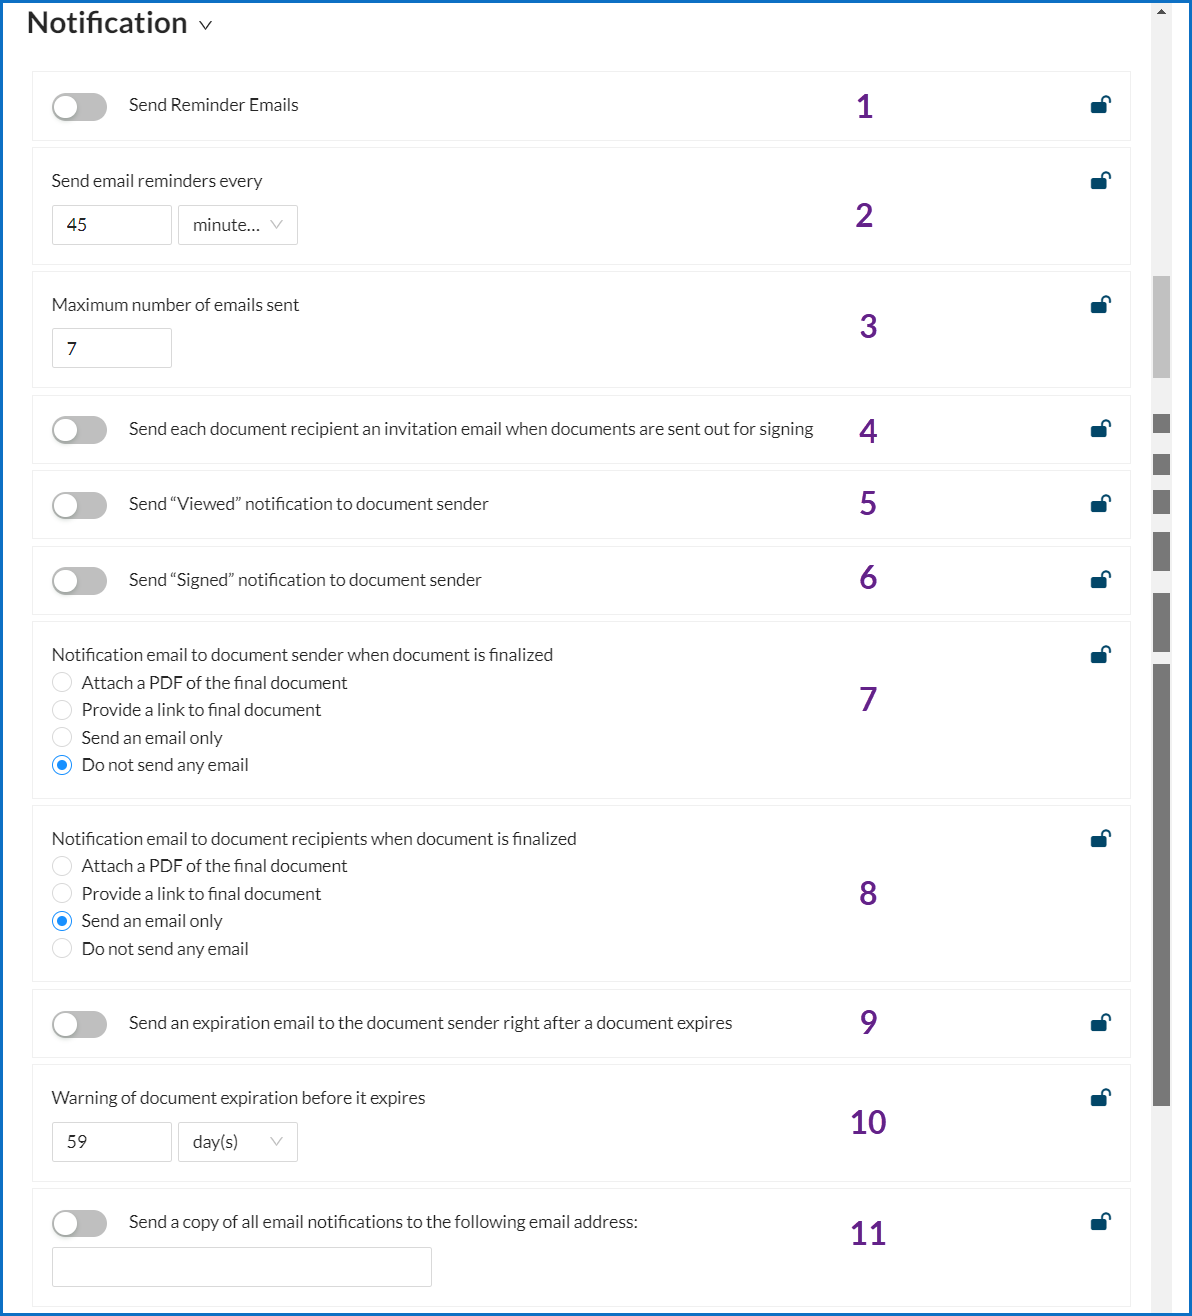
Notification Settings
The notification settings is where you will set up the kind of notifications you would like to receive and the notifications you would like to send signers and views.
These settings include:
- Sending Reminder Emails to signers
- How often you would like to send reminder emails
- The maximum number of reminder emails to send
- Sending out an invitation to sign the document
- Receive a notification each time a signer has ‘viewed’ a document
- Receive a notification each time a signer has signed a document
- The kind of ‘Signing Finalized’ email you would like to receive
- The kind of ‘Signing Finalized’ email you would like the signer to receive
- Receive a notification if a document has expired before being signed
- Set a default time before a document package expires
- Have all notifications sent to another email address
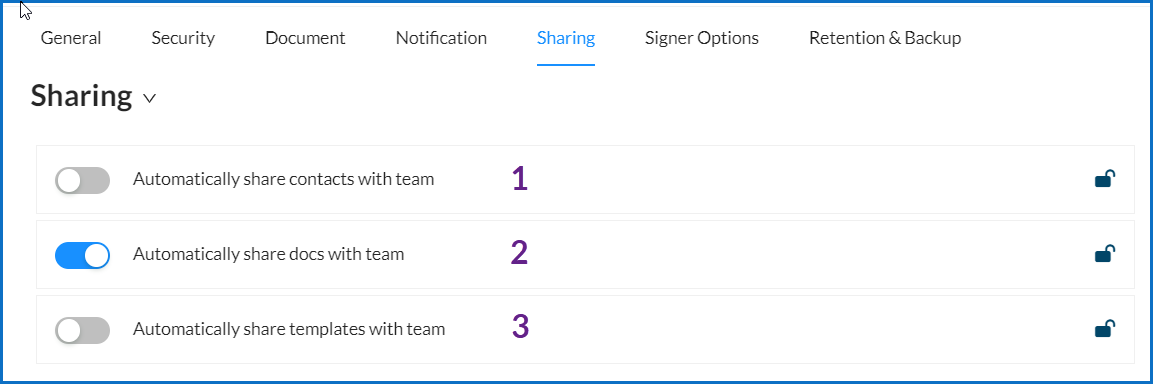
Sharing Settings
These settings allow you to set whether or not your users will automatically share:
- Documents with their team
- Templates with their team
- Contacts with their team
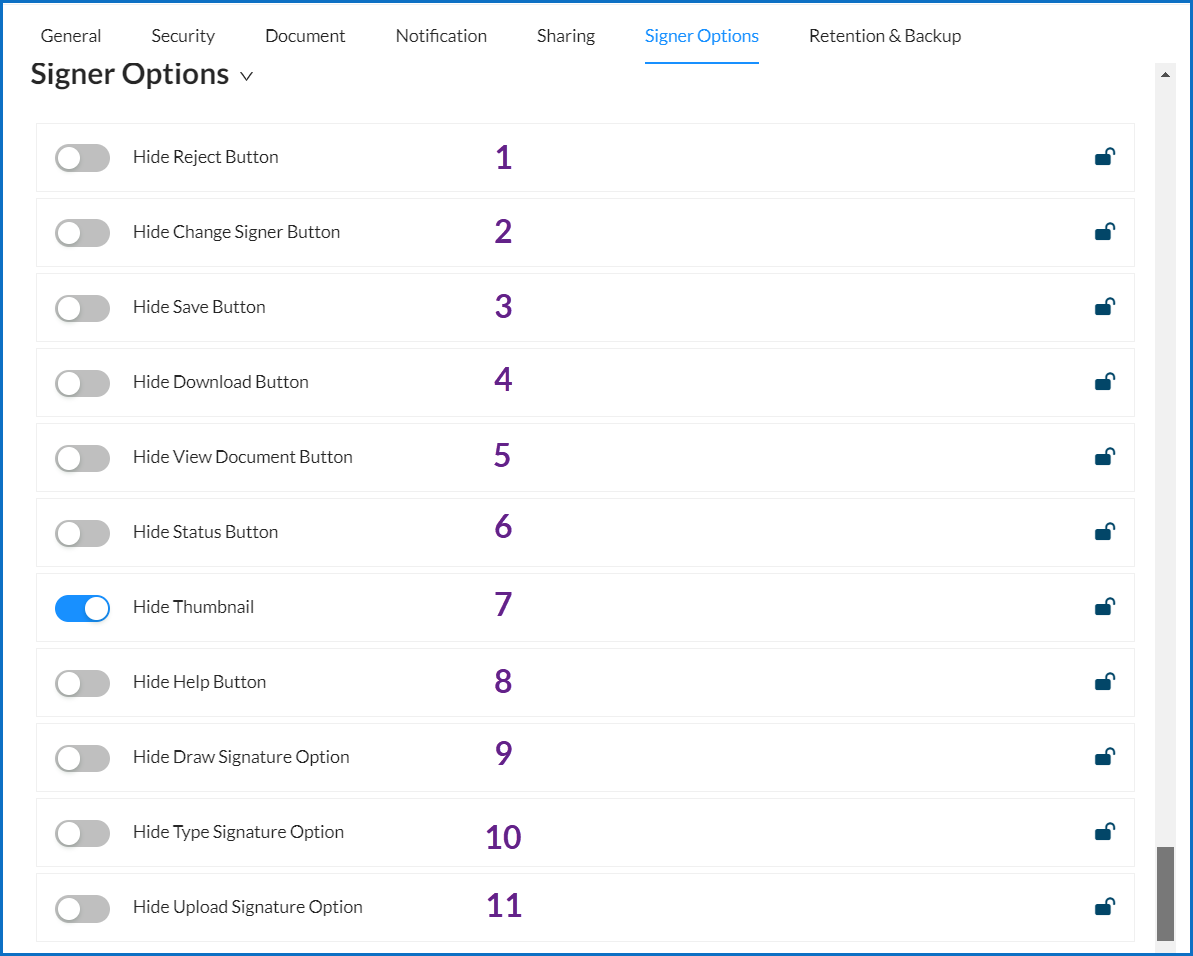
Signer Options
Signer options allow you to allow, or restrict, signers from being able to do the following:
- Reject a document
- Change the signer
- Save the document before it is completed
- Download a copy of the document before it is completed
- View the document after leaving
- See the status of the document
- See the thumbnail section automatically expanded in the signers page
- Access the Help section
- Draw their signature
- Type their signature
- Upload an image of their signature
Retention & Backup
This section allows you to set up enable our retention policy feature.
Here you can:
- Enable or disable Document Retention
- Set a retention period
- Choose a retention type
- Set that all documents are saved to a cloud storage before they are purged
