
Creating and Using Electronic Signature Templates
You can save a great deal of time with Signority’s electronic signature templates. Whenever you need it, you can easily send pre-prepared documents to your signers with just a few clicks! Here’s a step-by-step guide to creating and using a template.
Creating and Using Electronic Signature Templates
To create a template, click +New and then New Template.
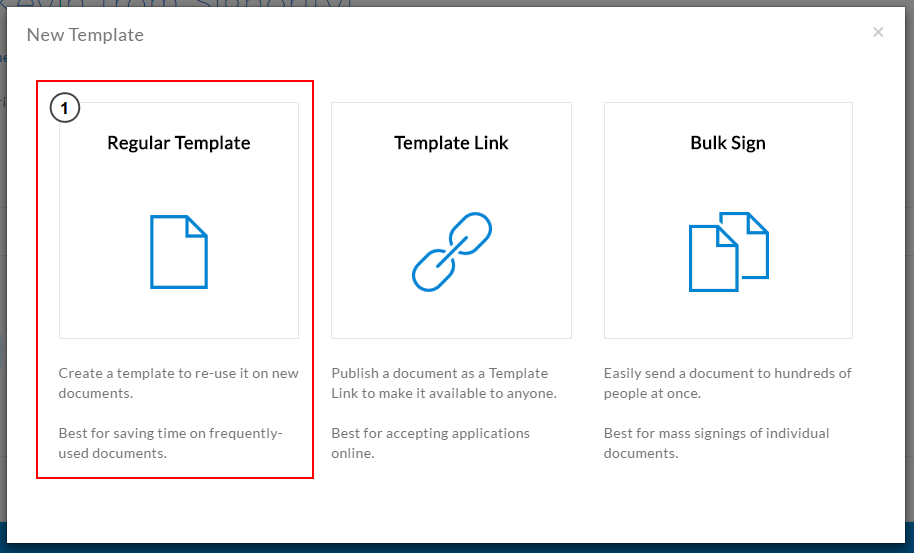
When prompted, click on the Regular Template icon.
Creating a template is the same as creating a Document, but there are few things to keep in mind. First, is that you are taken directly to the Editor page, unlike a document, where you start on the Upload page.
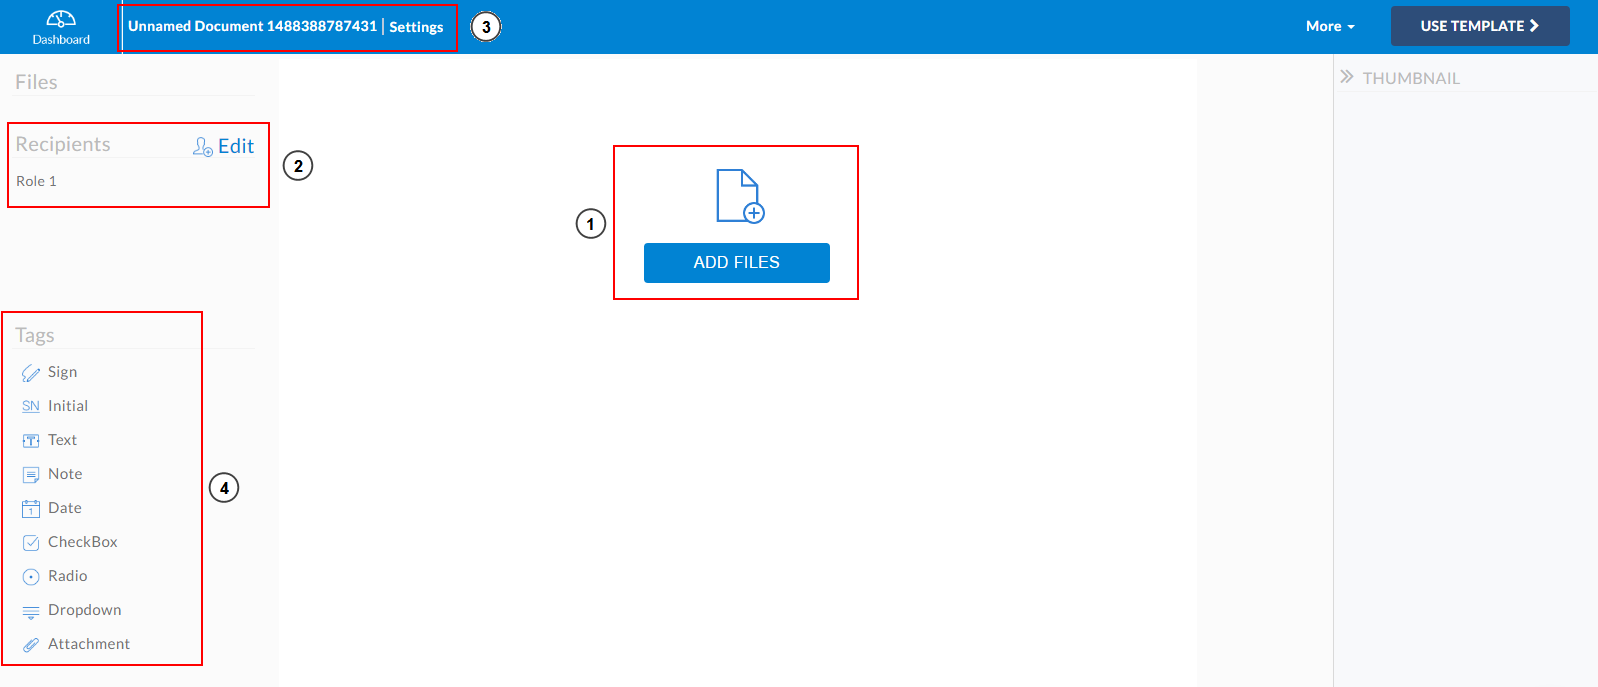
- Begin by using the Add Files button in the middle to upload the document you wish to use for making the Template
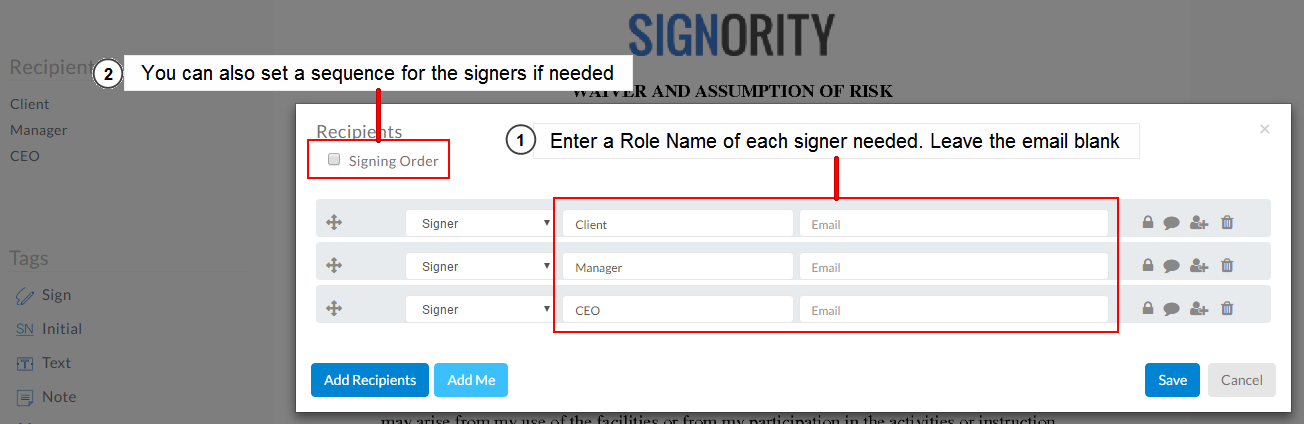
- Click on Edit in the Recipients section to edit the Roles of your signers. Since this is a template, you will not be specifying the signer’s name and email like you did with a document. That will be added when you use the Template. Instead, create roles so you know whose name and email goes where, such as Client, Supervisor, or CEO. Add a signing order if you want to sequence your signers.
- Once you’ve created the roles for your template, go to the Settings in the top left and edit any email messages or notifications settings you want. This will become the default settings for your template, so whenever you use it, the document will have those settings as well.
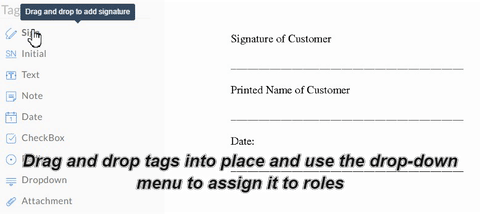
- Finally, drag and drop Tags from the left and assign the tags to the correct roles by using the drop-down menu after selecting the tag. Continue through the rest of the template document.
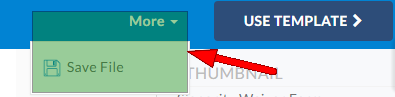
- Once you’re done tagging, click on the More option in the top right next to the Use Template button. Select the Save File option to make sure all your changes are saved. When you’re finished, you can close the window or go back to the Dashboard.
You’ve now finished creating the first of many electronic signature templates! For all your commonly used documents, try creating templates to save time!
Using Electronic Signature Templates
There are two ways to use a template you’ve created.
- From the Editor page where you were setting up the template. Where you clicked More>Save File, instead click the Use Template button; or
- Go to the Templates page from the Dashboard and then click the Use Template button to the right

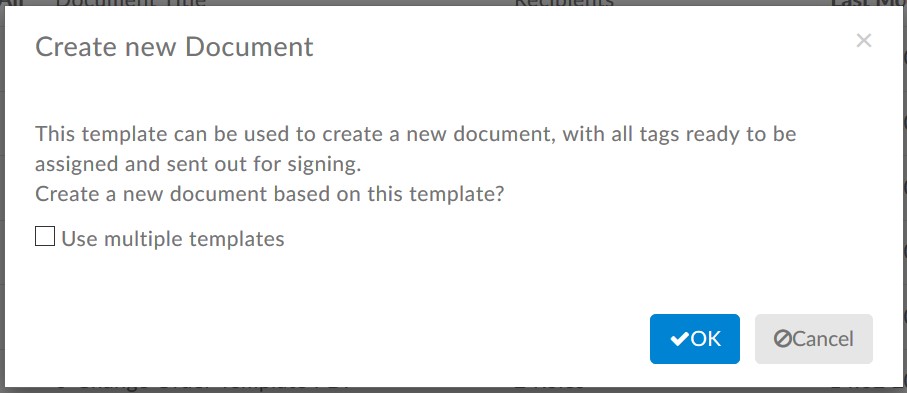
- After you click on the Use Template button, you’ll be prompted with the following message. Just confirm the creation of a New Document and you will be redirected to the Editor page to prepare for signatures. If you need to combine multiple templates into one document, check the “Use multiple templates” checkbox. To learn more about combining templates, read this article.
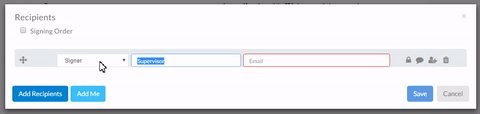
- Since the template has already set up the document with the tags, the only thing you need to do is click Edit next to the recipients, and then replace the Role names with the signer’s actual name and email.Please make sure that the roles are replaced with the names and emails of the signer to automatically assign the tags to them. If you add new signers (i.e using the Add Recipients or Add Me buttons), make sure to add new tags that are assigned to them.
When you’re happy with the document, you can just click ![]() in the top right to send the document for electronic signatures! And you’re finished!
in the top right to send the document for electronic signatures! And you’re finished!
Further Readings
Track and Monitor Document Status & Workflow
Publishing Template Links for Online Signing
Setting Up Documents with Witness Signers