Documents for In-Person Signing
Ever had a situation where the signer is coming to see you in person but still wanted to use electronic signatures? Or maybe they do not have an email? That’s no problem! This document will go over the steps to set up a document for in-person signing to cover for these scenarios!
Creating a Document for In-Person Signing
Begin by creating a new document as you normally would, by selecting the +New and selecting New Document. The major difference in the preparation work comes during the recipient page. Check out our page on creating electronic signature documents here to learn the other steps.
When you get the Recipient page, things will start to differ from the regular document creation process. Begin by adding a recipient (or yourself if you are going to host the in-person signing) using the Add Recipients button. For the person who will host the in-person signing process, change them from a Signer to a Signing Host using the drop-down menu for the roles. An extra icon of a house will appear.

When you select the In-Person Signing option, a second row will appear below the signing host. Enter the In-Person Signer‘s name and email address. You will also want to authenticate these signers. Since the document is not sent through an email, adding an extra level of authentication allows you to validate the In-Person Signer even further.
Click on the lock icon next to the In-Person Signer, and when prompted, select the ID Authentication and specify the type of ID you want to use for validation, such as Driver’s License or Passport.
If you need to add more than one in-person signer, you can do so by clicking on the house icon again next to the signing host.
When you’re done, click Save

With the recipient list set, finish up any recipient settings you might want and then move to the next step. On the Editor page, drag and drop the tags from the left into place within the document. Assign the tags to the correct signer by clicking on a tag and using the drop down menu to change the recipient. Tags assigned to the in-person signer will have a house icon.
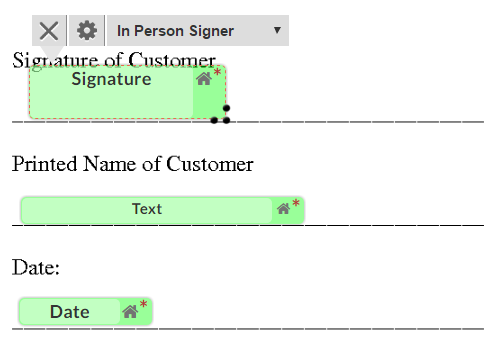
When you’re finished, click Next to finish preparing the document. When it’s time to sign, go to your email and open the invitation email to access the signing page or access the document from your Inbox from the dashboard in the Navigator bar.
Alternatively, you can publish a template link for online signing and save the link in your browser.
Hosting the In-Person Signing
When it’s time to sign a document with In-Person Signers, how you sign documents online is a bit different than for a normal document. The in-person signers will need to authenticate themselves in order to add their signature. The process is very similar to the witness signer authentication process.
The first thing signers should do is to fill out all the information except for the signature tag. When the remaining tags are filled, select the Signature tag to begin the authentication process.
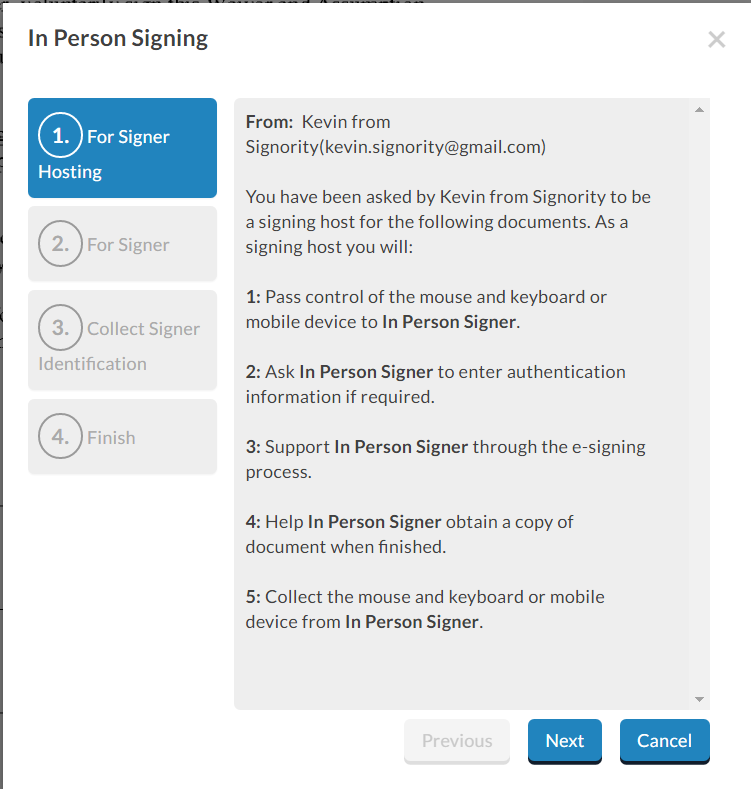
They’ll need to first acknowledge that they are doing an in-person signing and then agree to the terms of service. They’ll also need to put in their email to receive the finalized document.
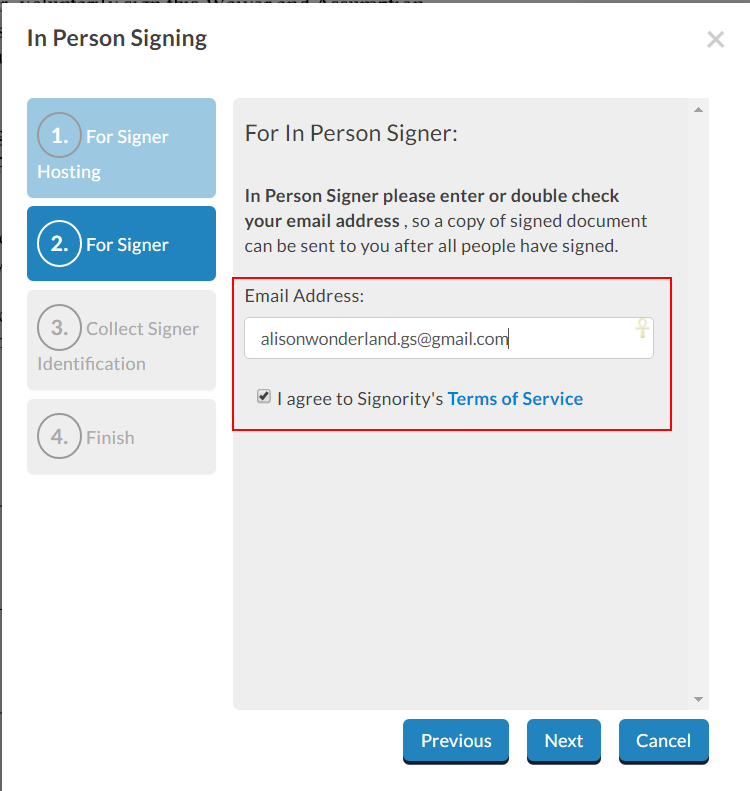
If you’ve set up any ID authentication here, the in-person signer will need to enter the information of the specified ID. This information will be captured in the audit trail as a way of validating the in-person signer’s identity.
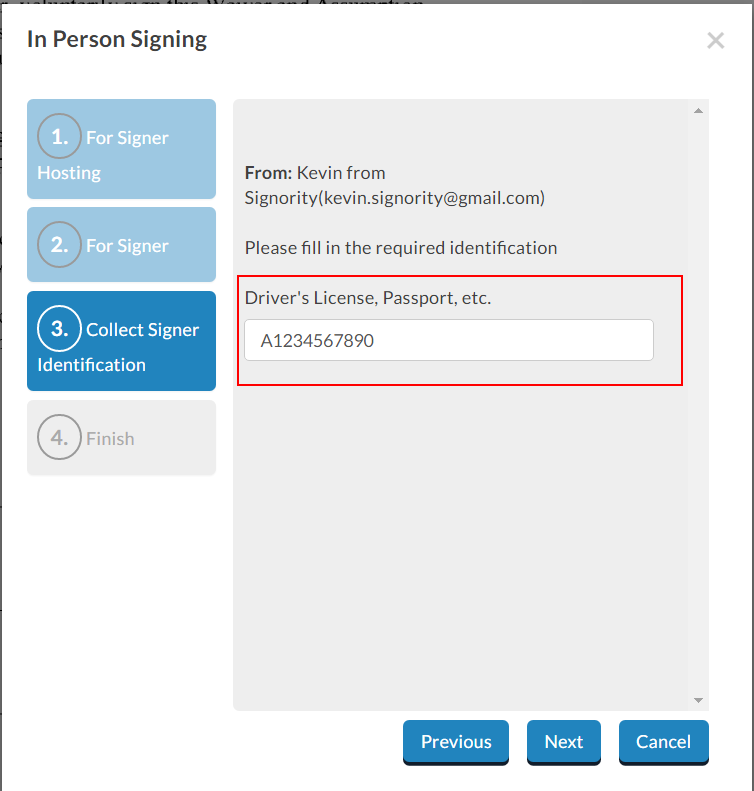
Once they’ve added their ID authentication details (if applicable), they can complete the authentication process. Simply click Finish when you arrive to the last step.
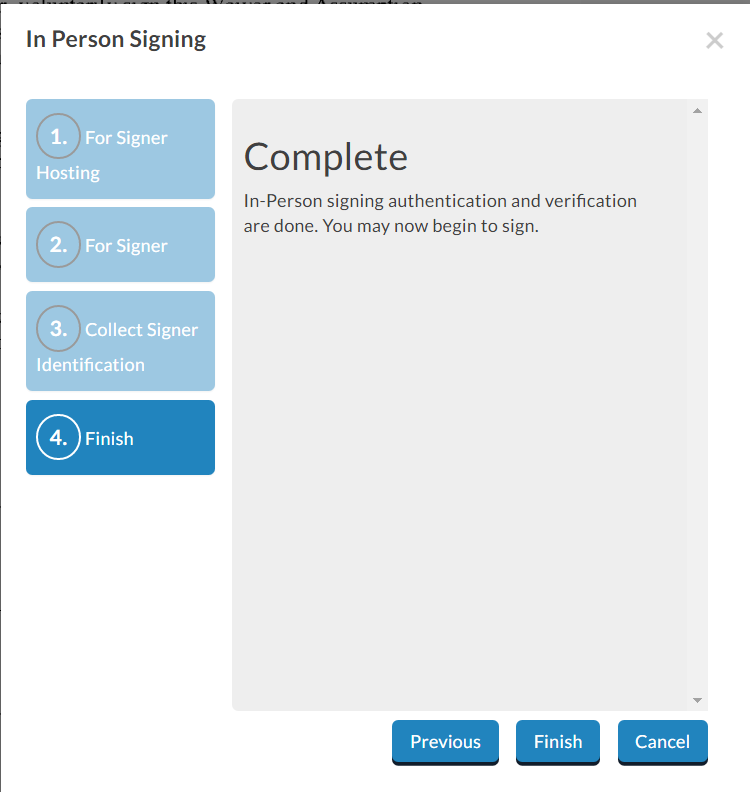
When this is done, they will be able to sign and fill in the tags. Repeat this process for each of the in-person signers (if there are more than one) and then complete the rest of the document. Submit the document when it is completed. If there are other non-in-person signers, the document will be completed once all parties have submitted their portion.
The final document will be received by all signers, including the in-person signer, as well as the sender.
Further Readings
Setting Up Documents with Witness Signers
Electronic Signature Authentication using Email and SMS Authentication
Using Page View Evidence for Sensitive Documents

