Setting Up Documents with Witness Signers
When adding a recipient, you have the option to require a witness for their signature. A witness signer is assigned their own tags within the same document but is linked to a specific recipient and must be physically present with them during signing — they access and sign the document at the same time and in the same location. If you need a refresher on creating a document, visit our guide on creating a document before getting started.
Are you a witness signer? Check out our guide on signing as a witness to see what the experience looks like from the signer’s side.
Adding a Witness Signer
A witness signer can be added in two places:
- On the Recipients page when creating a new document
- In the Recipients panel in the Document Editor, when editing an existing document or working on a template
Adding a Witness in the Recipients Page
- Start a New Document: Click +New button in the main header and select New Document.
- Upload the document(s) that requires a witness signer and then click Next to go to the recipients page.
- Add Recipients: Click Add Recipient until you’ve added all required signers, entering each person’s name and email address.
- Add a witness to a recipient: To the right of each recipient, you’ll see four icons. Click the ellipsis (···) icon — the third icon — and select Add Witness from the dropdown.
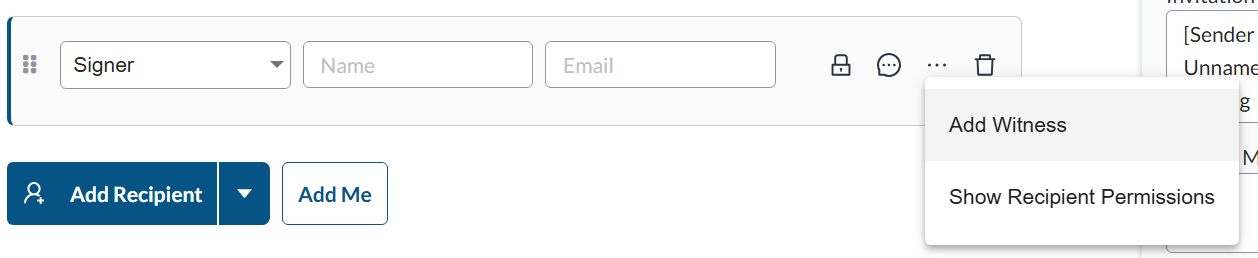
- A witness will then be added as a linked recipient beneath the signer. To add more than one witness, click the “Add Witness” button.
- Click Next when you’re done on the Recipients page.
Add or Edit a Witness in the Document Editor
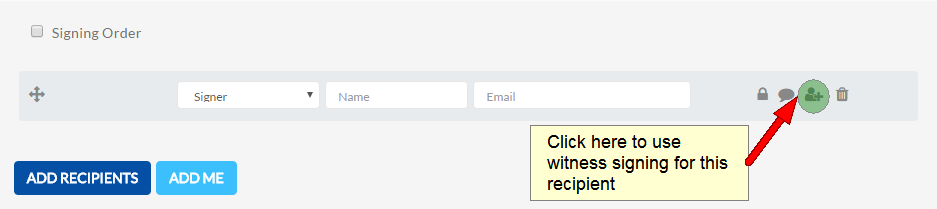
- Select Edit next to the recipients section on the left panel.
- There are four icons to the right of a recipient, click the third (a person with a + symbol) icon next to the signer that needs a witness.
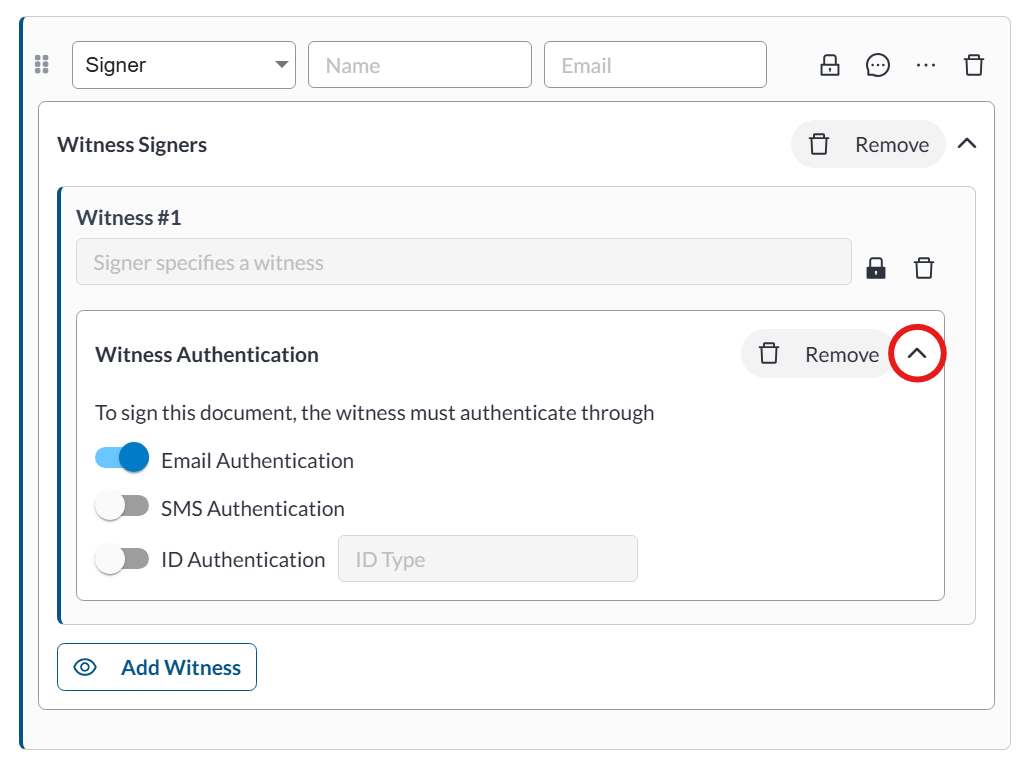
- The witness signer’s name and email are unknown to the sender, so you must set up an authentication method by clicking on the Lock icon and select the authentication method you like: email, SMS, and/or ID. This allows you to validate their identity. Click ‘Next’ or ‘Design my documents’ when you’re done. Note that for ID authentication, you must specify what kind of ID information you want from the witness.

Setting Up Witness Signer Authentication
Since the witness signer’s name and email are unknown to the sender at the time of setup, you’ll need to configure an authentication method to verify their identity. Email authentication is enabled by default but out can also enable SMS and/or ID authentication. To view and modify the settings authentication method, click the expand arrow beside the Remove button in the Witness Authentication panel.
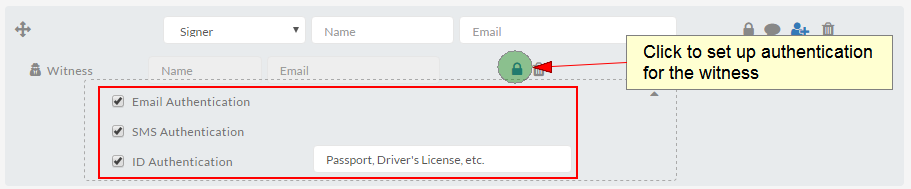
Note: If you select ID authentication, you’ll need to specify what type of ID information you want to collect from the witness.
Assigning Tags to a Witness
After adding your recipients, you can assign tags to them in the Editor. Unlike other recipients, witnesses are not listed in the standard Recipients list. To assign a tag to a witness:
- Select the tag you want to assign to a witness.
- In the tooltip that appears, open the recipient dropdown and select the witness.

Note: Tags assigned to a witness signer will display a distinct icon in the top-right corner of the tag to distinguish them from other recipients.
Once all tags are assigned, you can send the document for signature.
Further Reading
Validate Electronic Signatures with Email & SMS Authentication
Setup Documents for In-Person Signing
Benefits of Digital Signatures