Creating a Regular Template
Regular templates are pre-prepared documents that can be sent to signers whenever needed. Best for saving time on frequently-used documents.
Create a New Regular Template
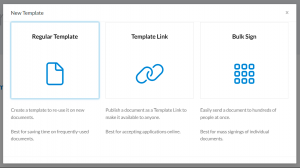
- In Signority, on the top header, click +New > New Template > Regular Template.

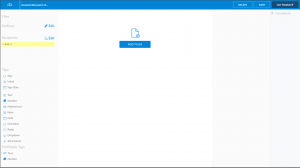
Note: Unlike when you are creating a document, you will be brought directly to the Editor page to design the template. - Upload your file by selecting the Add Files button in the middle of the document editor.

- Adjust settings for the document by clicking Edit next to ‘Settings’ on the left panel. A pop-up will appear where you can customize the settings for the template. Some of the settings you can define are:
- Title and Email: Customize the name for the template and customize the email settings.
- Notifications: Modify the notifications for the template.
- Advanced Settings: Enable page view evidence
- Signer Views: Define what recipients are able to view.
Note: Settings defined for a template will become the default settings for the document.
- Add recipients to your template by clicking on Edit next to ‘Recipients’ on the left panel. For regular templates, instead of adding the signer’s name and email like you would with a document, you can define a recipient role, such as ‘Client’, ‘Supervisor’, or ‘CEO’, so you know whose name and email will be assigned to that recipient when using the template. Their specific name and email can then be added when you use the template.
Note: If you want signers to sign the document in a specific sequence, add a signing order.

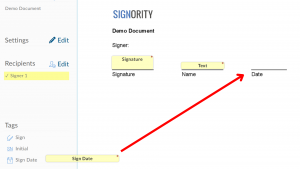
- Add tags to your document and assign them to the correct role by selecting the tag and using the drop-down. Continue adding tags through the rest of the template.

- Once you’re done creating your template, review it to make sure everything is correct before either saving the template for later or using it right away.
You can access all of your templates by going to the templates page if you ever want to use or edit them.
Further Readings
Track and Monitor Document Status & Workflow
Publishing Template Links for Online Signing
Setting Up Documents with Witness Signers

