Send a Document for Signature
Getting signatures online is exactly what Signority is for. In this post, we’ll be going over how to create an electronic signature document so you can begin collecting signatures and closing business deals!
Before you begin, you’ll need two things:
- A document to send (preferably in PDF format but almost any other file format will work); and
- The names and emails of the signers for that document
How to Create an Electronic Signature Document
Begin by clicking +New and then New Document to start creating a new document.
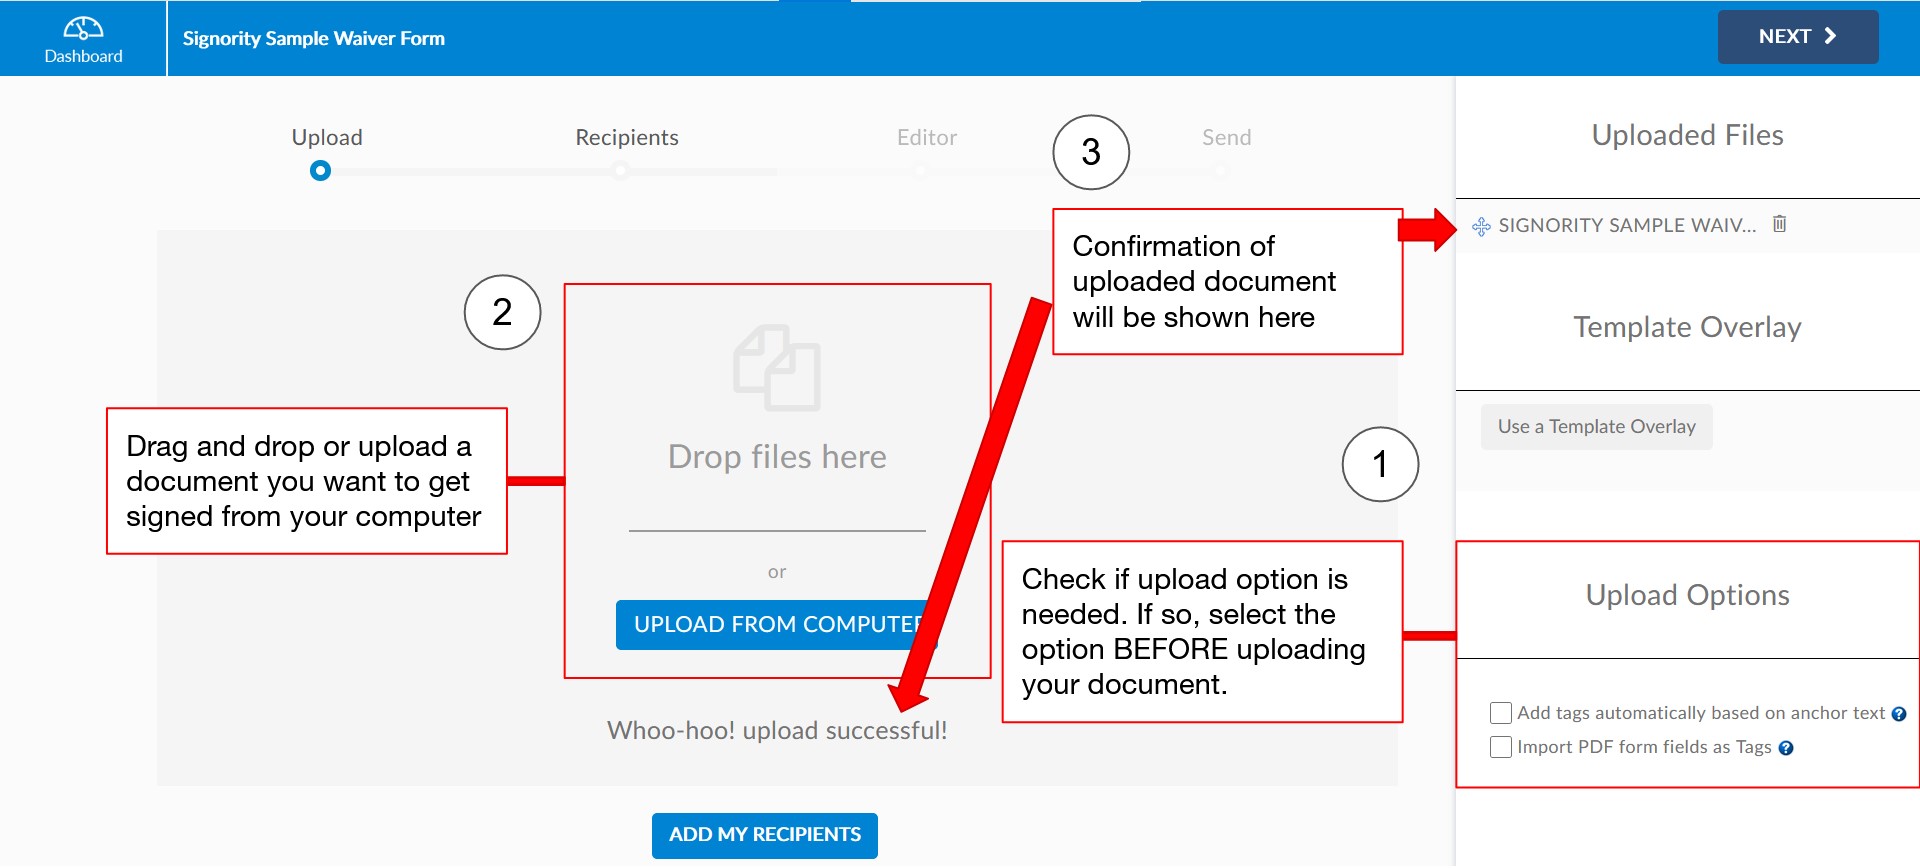
- The Upload page: if you have a document that has PDF form fields or anchor text, you can select those options first before uploading your document. This will let the system know to upload while searching for those options. However, with or without Upload Options, upload or drag and drop the file you want to use to create electronic signature documents. A message will appear when a document is successfully uploaded and will be listed on the right-hand side. When you’re finished, click Next or Add My Recipients buttons to continue to the next step.
- The recipients page: Using
 , you can add as many signers as you need for a workflow. The
  option lets you create a sequence for your signers and further customize the workflow to fit your needs. When you’ve added your signers, personalize the invitation email to your signers by changing the email subject line and body message to suit your needs. When you’re finished, you can also set up some recipient and document settings on the right, such as setting up your automated reminder schedule and capturing page view evidence from your signers. When you’re done, click Next to edit the document to capture the electronic signature and any other information from your signers!
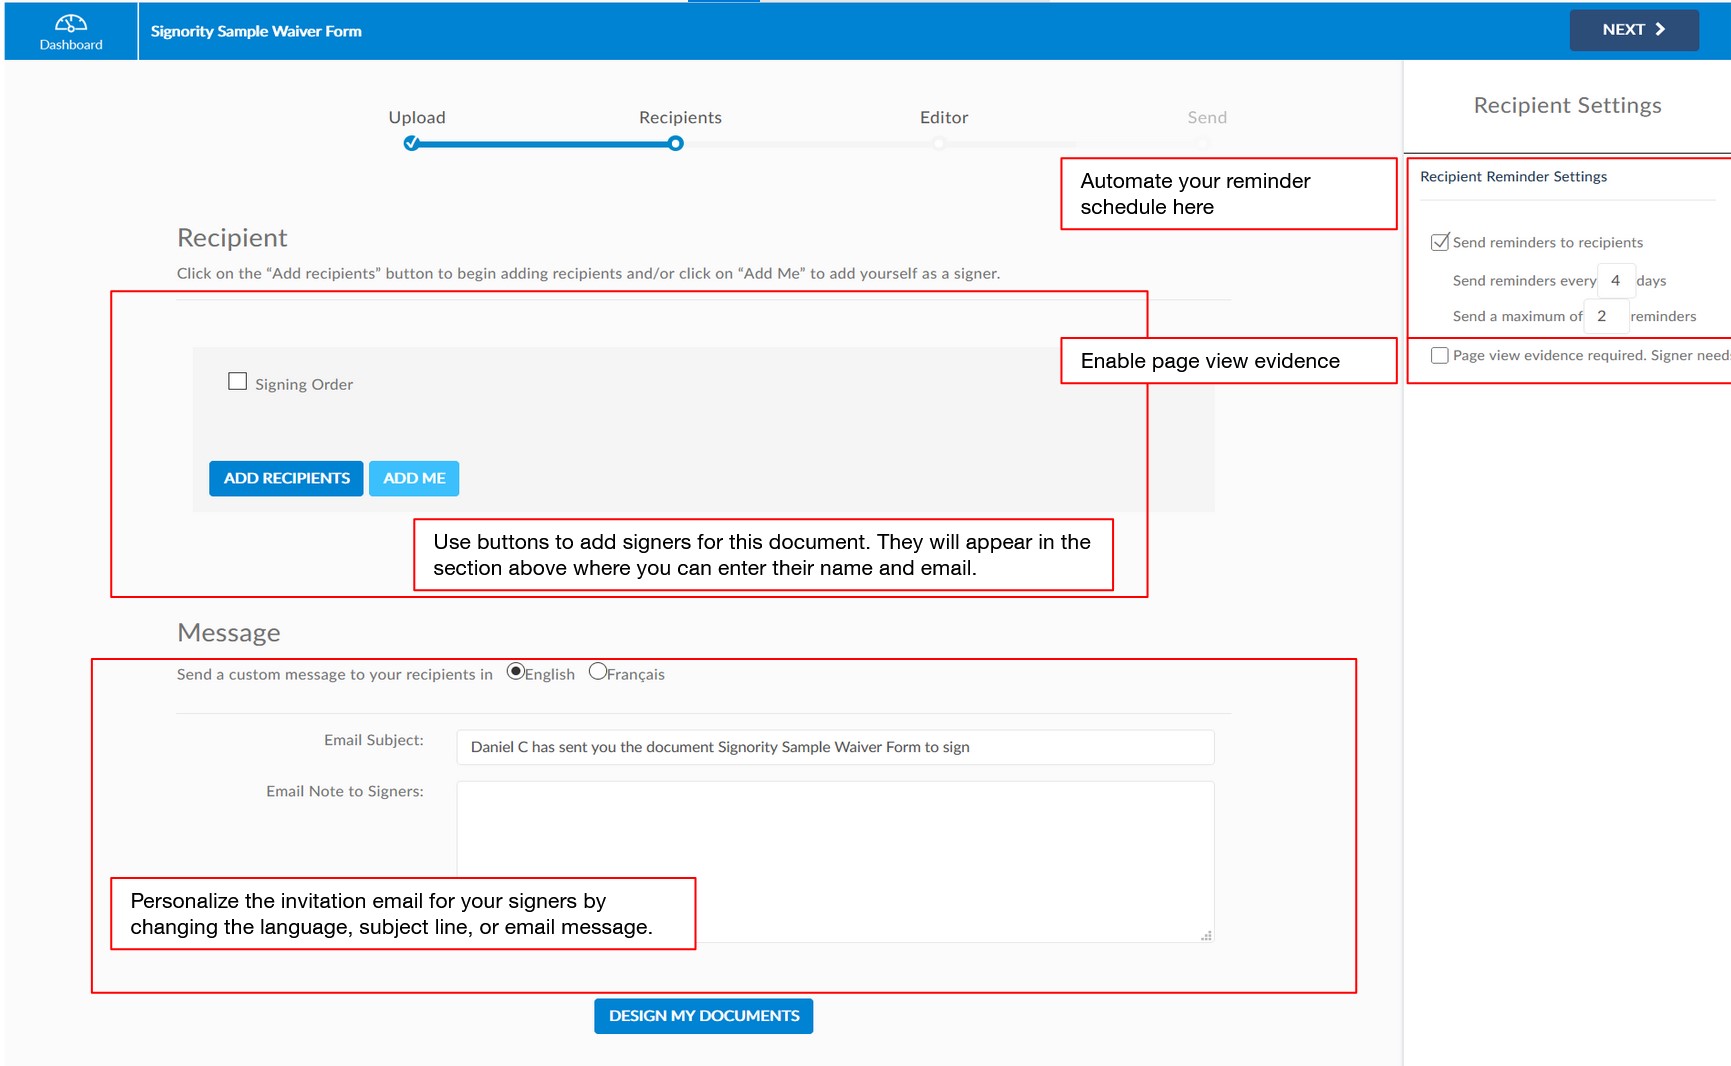
- On the Editor page, you will see the document you uploaded, as well as the signers listed on the left. You can change them if there were any mistakes or differences. At the top of the page, you can also customize the document settings.

- Finally, once the document settings are finalized, drag and drop the tags from the left onto the screen. Use the drop down menu after selecting a tag to change who the tag is assigned to. You can get an overview of tags and what they do here. The tags will change color to indicate different assigned signers. Also notice that after you change a signer for one tag, the following tags will be assigned to them as well. You can find more information on tag settings and assigning tags here.
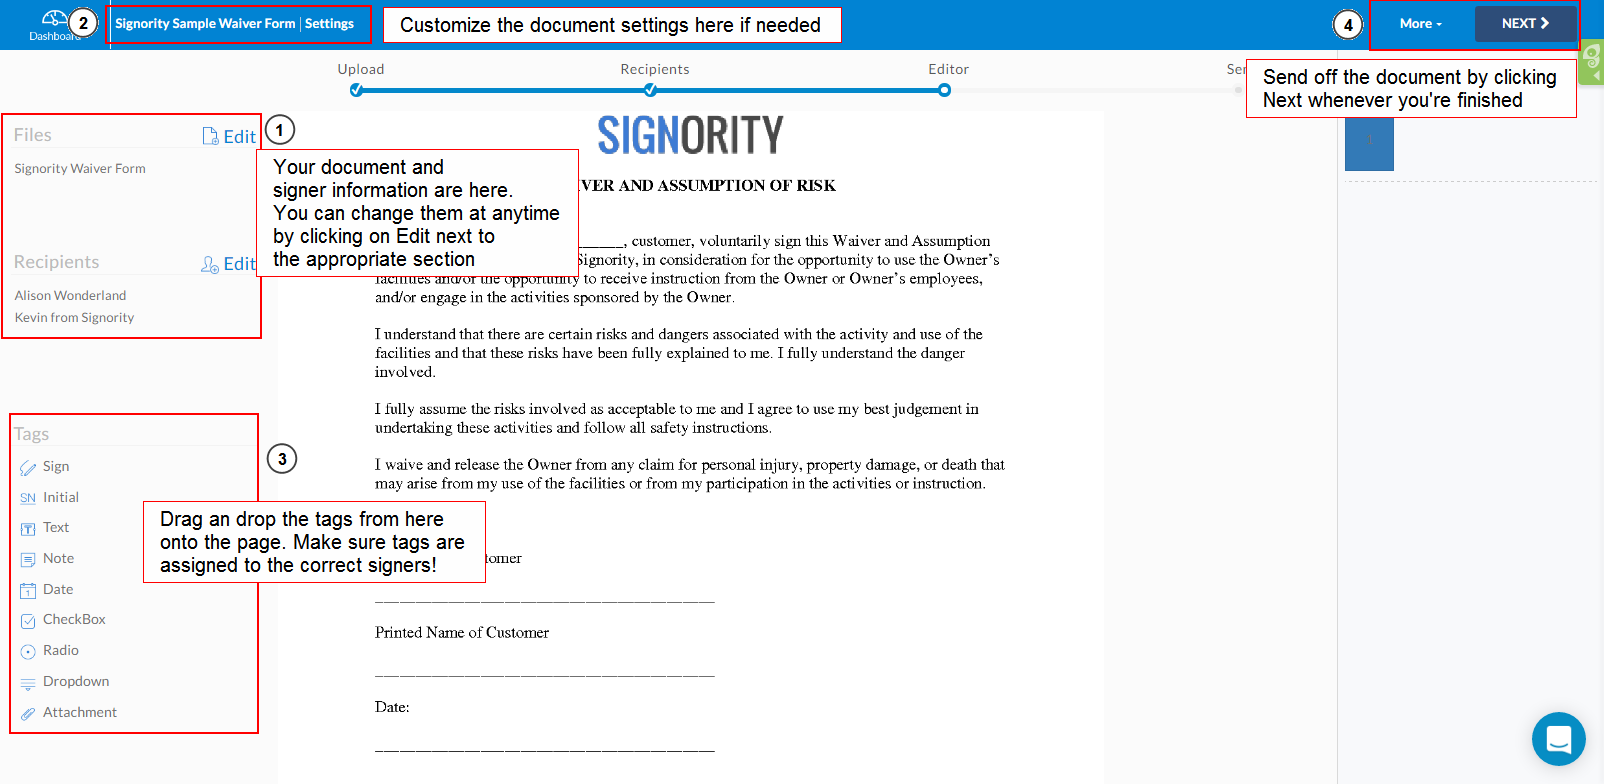
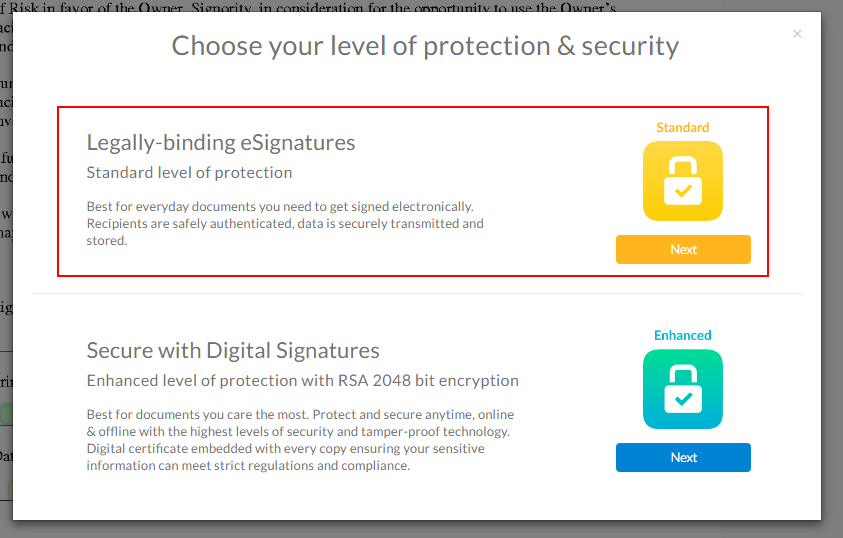
- When you’re finished assigning tags to all your signers, review the document and then Next to finish up the design process. When prompted, select the standard electronic signature option.
- When it’s successfully sent, you will be taken to a Congratulations page to confirm that it was sent properly. The system will count this send towards your usage. Notice that regardless of the number of signatures or files in each document sent, Signority will only count it as one.
If you need more information, check out our video below and get a step by step on how to create electronic signature documents from scratch.
Further Reading
Learn how to set up templates
Learn how to set up default reminder schedules and deadlines
Learn how to electronically sign a document for yourself