Adding Multiple Recipients Simultaneously
Available with: All Plans Users: All
Do you have a document that requires multiple recipients? Simply enter or paste a list of emails separated with semicolons and the recipients will be created automatically.
Adding Multiple Recipients Simultaneously
Recipients can be added to a signing workflow in two places:
- On the Recipients page when creating a new document.
- In the Recipients panel in the Document Editor, when editing an existing document or working on a template.
Add Multiple Recipients on the Recipients Page
- Begin by creating a new document and then either upload your files or proceed directly to the recipients page by clicking Next in the top right of the upload page.
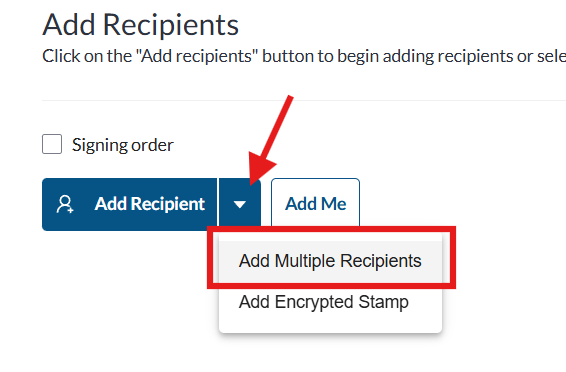
- Once on the Recipient’s page, select the dropdown arrow next the the Add Recipients button and then select Add Multiple Recipients from the dropdown menu.
- A pop up window will appear where you can type or paste your recipient’s emails separated with semicolon and a space.
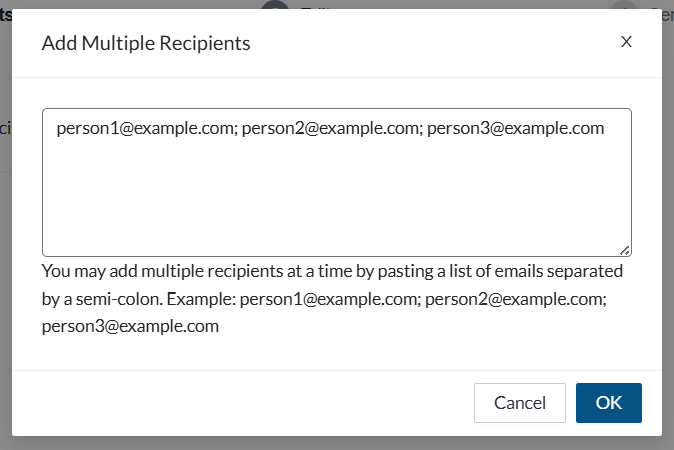 Note: Do not place a semi-colon after the final email address.
 - Click OK when done.
- Your recipients will automatically populate the workflow in the order listed as “signer” recipient types. Signority will prefill signers’ names using the first part of their email before the “@” symbol. Please review the names in your list and make any required corrections.
Note: If any of the email addresses you have entered are invalid Signority will outline them in red to show you where any corrections are needed.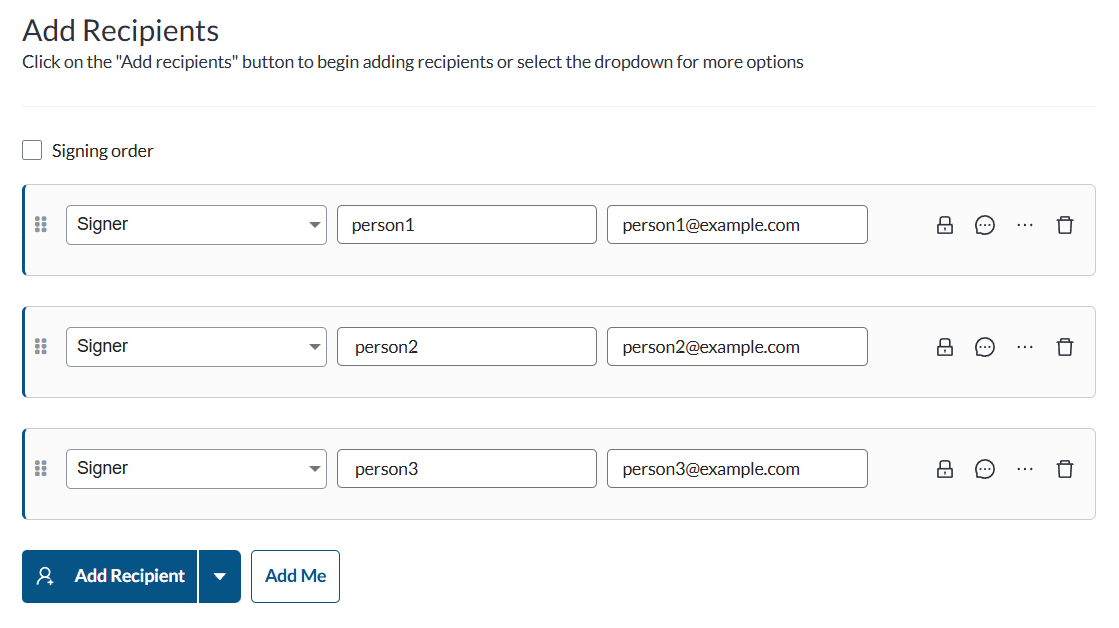
- Make any changes to the recipients, their settings, and customize the email message if required.
- Click Next and continue with the document creation process.
Add Multiple Recipients from the Editor
If you missed some recipients or are creating a template, you can also add recipients on the Editor.
- Select Edit next to the recipients section on the left panel.
- On the recipient list pop-up, select the Add Multiple Recipients button. If you see an ellipsis (•••) menu instead of the button, select it and choose Add Multiple Recipients (this applies if Encrypted Stamps is enabled).

- A pop up window will appear where you can type or paste your recipient’s emails separated with semicolon and a space.
Note: Do not place a semi-colon after the final email address.
- Click OK when done.
- Your recipients will automatically populate the workflow in the order listed as “signer” recipient types. Signority will prefill signers’ names using the first part of their email before the “@” symbol. Please review the names in your list and make any required corrections.
- Note: If any of the email addresses you have entered are invalid Signority will outline them in red to show you where any corrections are needed.
- Make any changes to the recipients, their settings, and customize the email message if required.
- Click Next and continue with the document/template creation process.