Global Settings Overview
Available with: All Team, Custom, and Enterprise Plans Role: Billing Admin & Super Admins
This page will review and explain the General Settings section of your Global Settings.
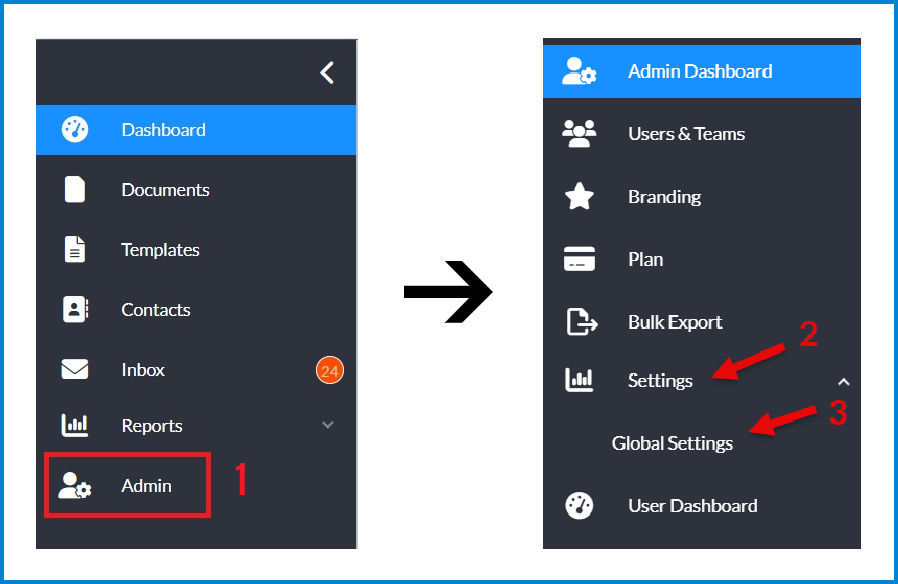
You can access the Global Settings by:
- Clicking Admin at the bottom of your left hand sidebar menu
- Selecting Settings in the Admin Console sidebar menu
- Choose Global Settings in the submenu that appears.
A pop up window will appear labeled Global Settings. Signority has made the Global Settings window as easy and intuitive to navigate and use as possible.
Navigating Global Settings
The quickest way to navigate the Global Settings window is to use the Menu of Settings at the top of the page under the header, as shown below in the red rounded rectangle.

As you can see there are seven (7) setting categories; General, Security, Document, Notification, Sharing, Signer Options, and Retention & Backup.
Each category is linked to take you directly to that section when you click on it. When you do the category will turn blue to show that is the category you are currently reviewing. In the image above you can see that we are in the General category.
Note: Any change you make in the Global Settings will affect all users within the organization’s account. Be cautious when making changes.
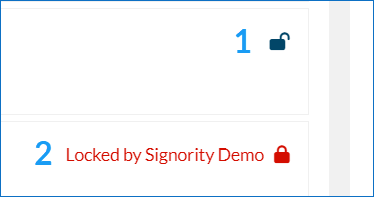
Locked & Unlocked Settings
When you view the Global Settings window in Signority you will notice that there are locks at the top of the window as well as at the end of the row for each individual setting. Here is what the two styles of locks look like:
What happens when a lock is open or closed?
When a lock is:
- Black and unlocked (open): The option chosen for this setting is set as the ‘default’ setting for any new users going forward. However, because it is unlocked, a user may change that setting if it is available in their Profile Settings. A Team Admin may also change or lock it for their Team if they choose.
- Red and Locked (closed): If a lock is closed, red, and has the words, “Locked by….” beside it, the setting is unchangeable and enforced for all users. For example, if an Admin locks the Enable 2FA/MFA and locks it, then all users must set up their 2FA before creating a document the next time they log in. They cannot put it off.
The “Locked by…” is there to let users know which administrator has locked the setting should they wish to appeal the decision.
Once you have made a change to your settings click Save at the top right corner of the window to update the settings.
Tip: Some changes will take place across the board while others, i.e.: Document Settings, will only apply to any new documents/templates created after the change has been implemented. Which it is will be confirmed within each Categories tutorial.
Can I Lock All the Setting?
Yes, once you have reviewed the settings to ensure they adhere to your company/industry standards and policies you may lock and enforce them all if you wish. To do this simply click the black open lock at the top left of the window next to the window title as shown below. This will lock all your Global Settings.