Manage Delegate Signers
Available with: Custom Plan Users: All
Delegate signers may sign documents on your behalf. This tutorial will guide you through adding a delegate signer, editing a delegate signers settings, and removing a delegate signer.
Note: Delegate signers may be anyone within your organizations account and do not have to be from your own team.
Managing Delegate Signers
Once enabled users will find a new section in their Profile Settings titled “Delegate Signer”. This is where you can add, edit, and remove delegate signers.
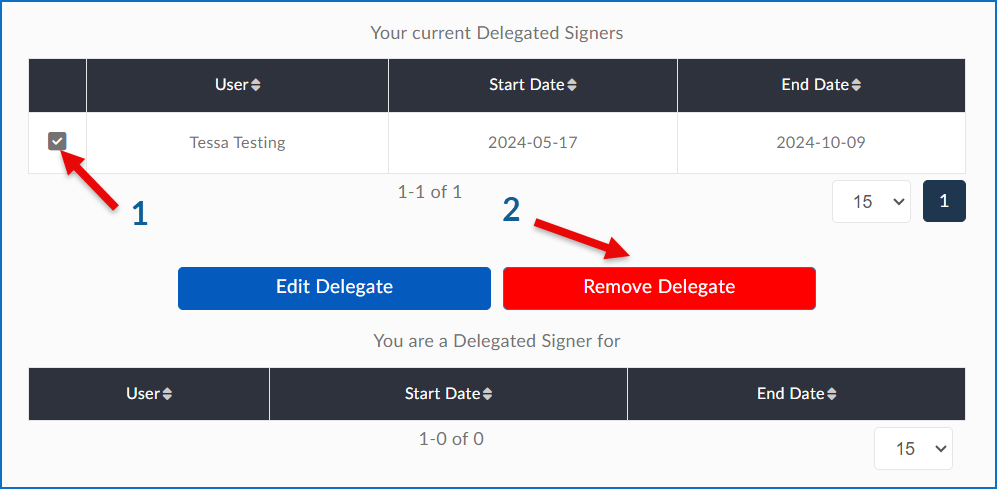
This page, as seen below, will show you who you have designated as your delegate signer (1), and who has designated you as one of their delegate signers (2).
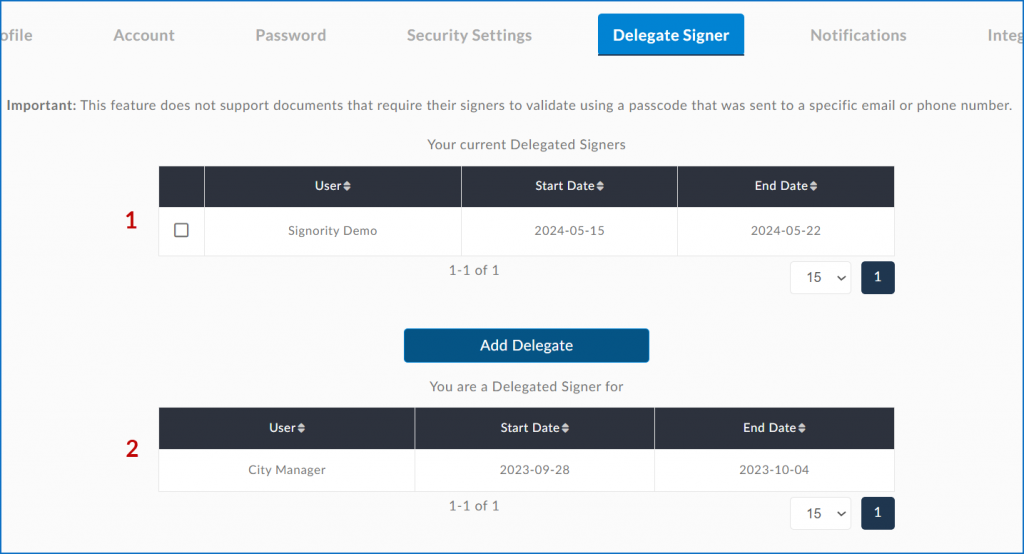
Note: Delegates will not receive notifications for documents where the sender has added ID Verification as a requirement for signature. (one-time passcode sent by email or SMS)
Adding a Delegate Signer
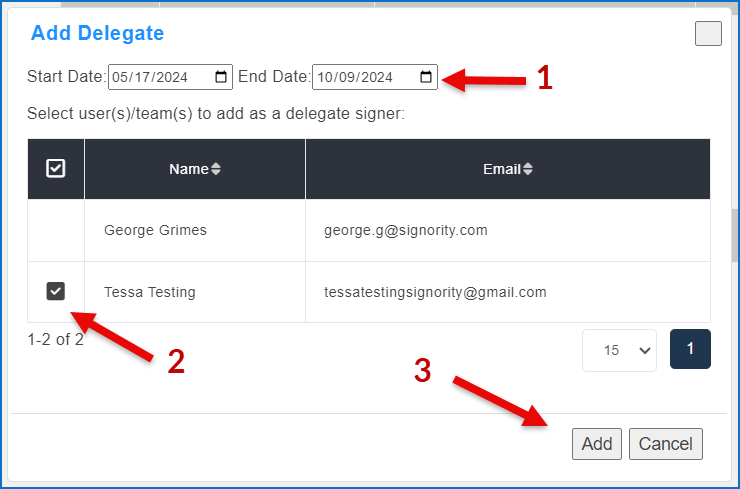
- Select the blue “Add Delegate” button
- On the pop-up that appears, set the start and end dates that they may sign for you (1), then check the box beside the user(s) you wish to assign as a Delegate (2).
- Once you are done, you can click “Add” (3).
The user will be sent an email notifying them that they have been assigned as a delegated signer like the one below containing their name, email, and the start and end dates.
Editing a Delegate Signer
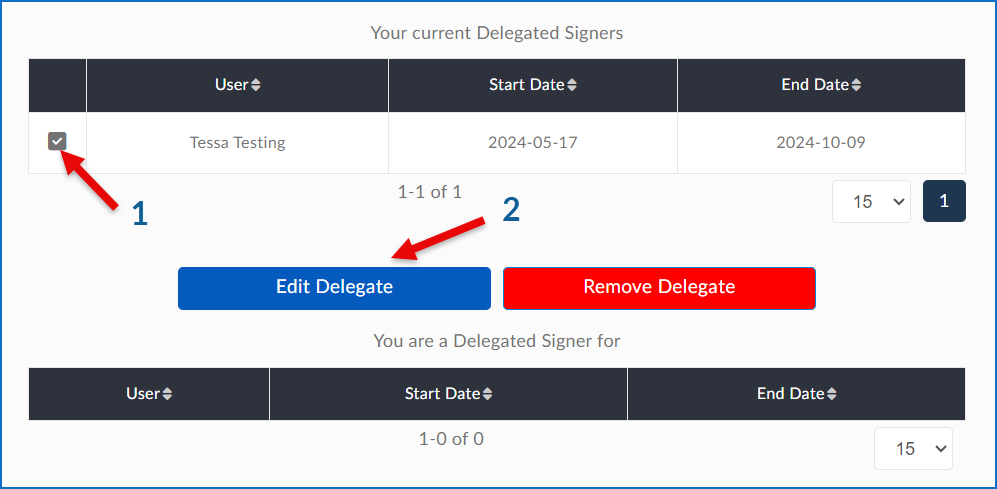
- Check the box next to the name of the delegate you wish to edit.
- Select the “Edit Delegate” button that appears.
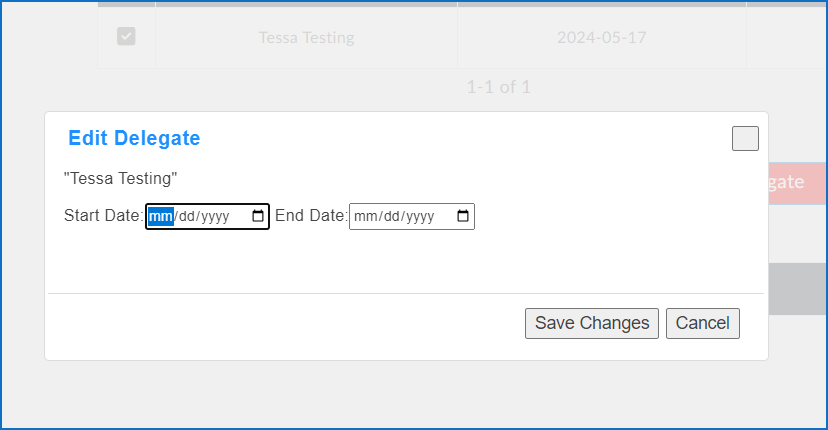
- In the pop up box choose a new Start Date and End Date, then select “Save Changes”.
Removing a Delegate Signer
- Select the checkbox next to the name of the delegate you wish to remove
- Click on the “Remove Delegate” button that appears.
Learn how to Enable Delegate Signing in your account.