Security Report
Available with: All Plans
Signority’s security reports show you your team’s login activities. As an administrator, this can be used to monitor your team and detect any unusual login activities. The report includes all login and logout activities for your users, as well as any password and 2FA changes made to each account.
Signority automatically generates a report at the end of every month, which will be titled “Monthly Report – Security Report -“MONTH YEAR” which can be found on their respective pages. Monthly reports not covering everything you want out of a report? Run a customized report with specific dates that better fit your needs.
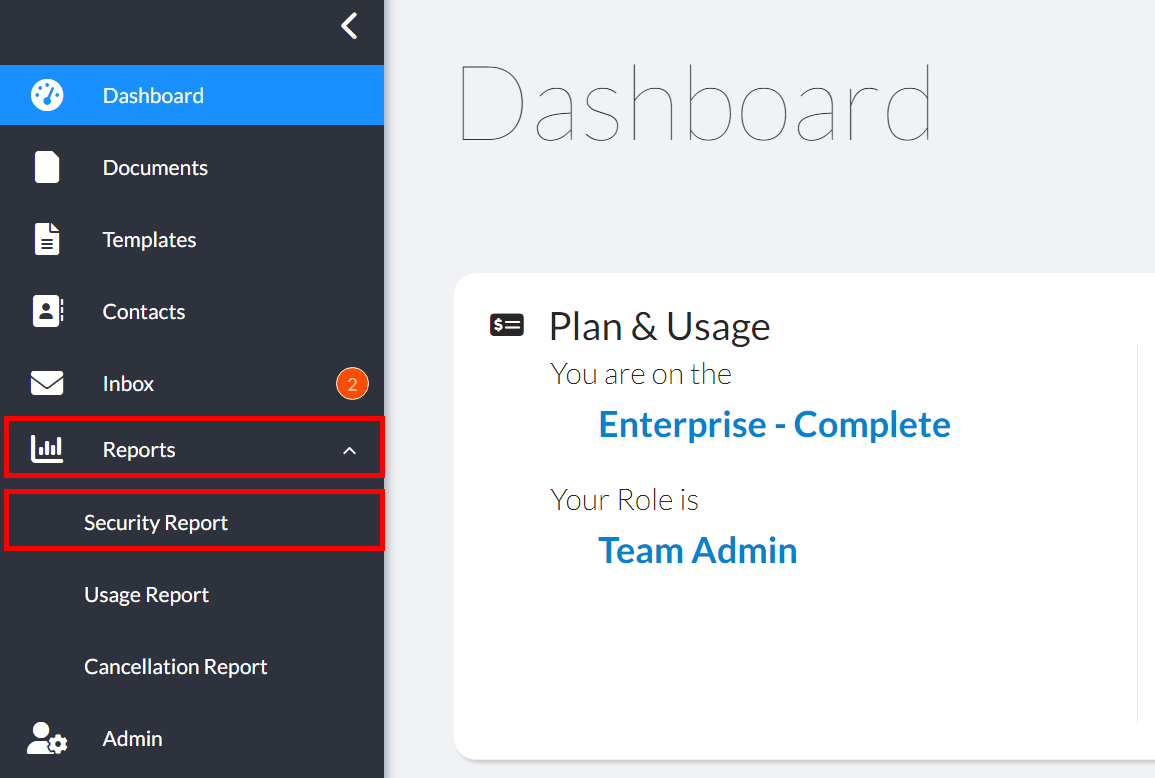
Accessing your security reports can be done using the left sidebar menu. On the bottom of this menu you will see an icon labeled Reports. From the User Menu, click on Reports, and then click on Security Report in the menu that appears as shown below.
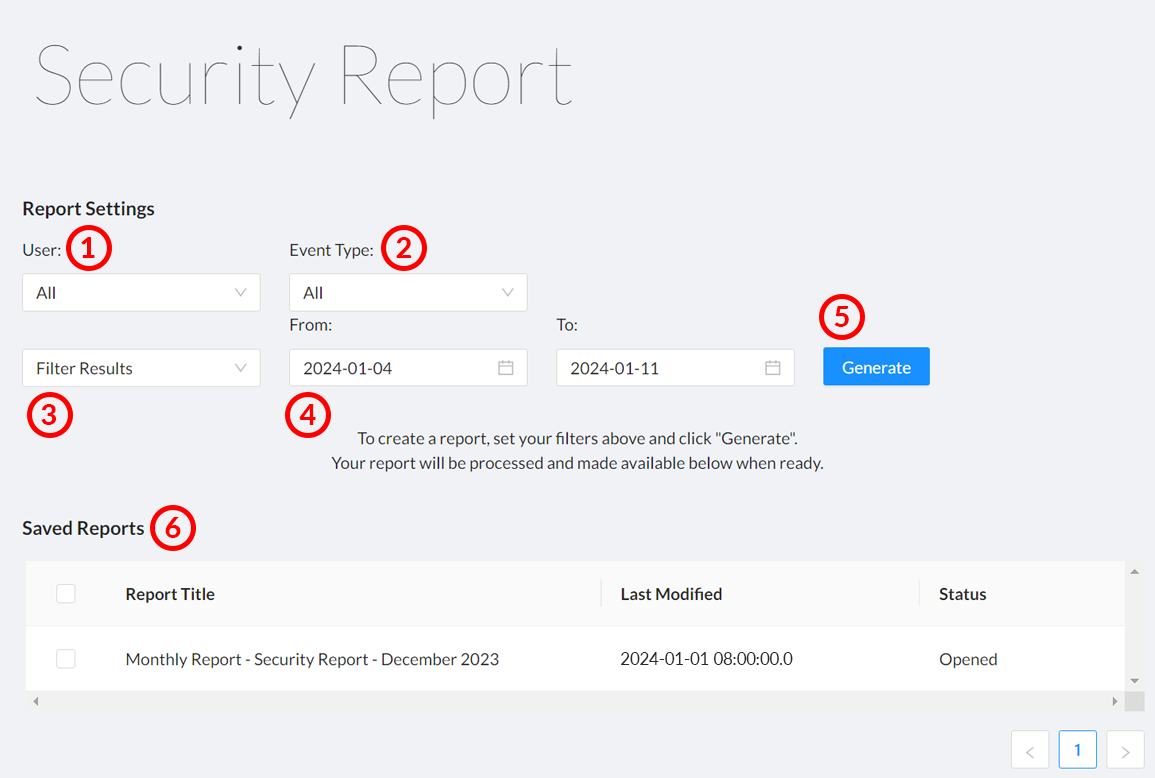
When the Security Report page opens, you will see a window similar to the one below. On this page, you will have access to your monthly reports as well as any previous security reports you have run.
How to Run a Security Report
- Select the timeframe you wish the report to cover. You can either use one of Signority’s default timelines (3) or specify a custom timeframe (4) you require.
- [Optional] Select a specific user and event type using the User (1) and Event Type (2) dropdowns.
- Click Run (5) to have the report generated.
- Your report will be generated and will be listed under Saved Reports (6) and an email will be sent to you once the report is ready for you to view.
- Once you receive the email, go back to the Security Report page to find your report under Saved Reports.
- Under Saved Reports (6) you can then click on the report to view it.
- Export the report as a CSV file using the “Download” button.
Note: Reports are run each night and will be ready by 8:00 am EST time the next morning. Otherwise, your report may take up to an extra 24 hours.
Security Report Page Features
- User: If you are a Super Admin or Billing Admin in your team, you will see all the users on your team in this list. You can also see everyone in one report.
- Event Type: This dropdown allows you to filter your results by the action your users or another admin have taken. The event types are:
- User login failed: Tells you when someone tried to login using the wrong username/password.
- Admin changed team member password: This is when an admin updated/changed a team members password
- User changed password: This is when a user has updated/changed their own password.
- User updated 2FA settings: This logs each time a user has updated their 2 Factor Authentication (2FA) settings. They may have activated it, deactivated it, changed a security question, etc.
- User reset password: This is logged when a user forgets their password and requests to reset it.
- Filter Results: When running a report, you can use the Filter Results dropdown to filter your reports by a Signority’s default timelines.
Note: When you run one of these filters the results will not include the day you are making the request.The preset time periods are:
- Yesterday: The day prior
- Last 7 Days: The previous 7 days
- Last 30 Days: The previous 30 days
- Quarter to Date: Quarters are based on the calendar year, Jan-Feb, March-May, June-Sept, and Oct-Dec. For example, if you are running this report on August 8th you will receive a report for the dates of June 1 to August 7th
- Last Quarter: The quarter prior to the one you are currently in
- Year to Date: From January 1st to the day before running the report
- Subscription Period to Date: From your subscription start date (or last renewal date) to the day before you are running the report (If you are paying monthly, you will receive only up to the previous 30 days. If you are yearly, it will go back up to 364 days, depending on when you are running it.)
- Date from/to: If the Filter Results menu does not suit your need, these fields allow you to run a report for a specific timeframe that you require.
- Run: This button will send the request for the report to be generated. Once complete, you will receive an email letting you know it is ready for viewing.
- Saved Reports: This is where your report will appear. It will list the reports’ status as queued (queued to be generated), complete (ready to view), or opened.
- Rename: Rename the report by selecting the checkmark next to the report and then clicking “Rename”
The information that will be included in the report:
- User Name: The team member this information is relevant to.
- Event: One of the events as listed above.
- Event Time: The time that this event took place.
- IP Address: The IP Address they completed the event from.
- Visiting OS: The operating system on the device they were using. (Windows, Linux, etc.)
- Visiting Browser: What internet browser was used for the event. (Chrome, Edge, Safari, etc.)