Creating and Managing a Document Deadline

Part of what simplifies an eSignature workflow is the ability to set a document deadline and improve the odds of completing deals on time! This page gives you a step-by-step on how to set up a document deadline, as well as monitoring the deadlines as it reaches expiration.

Setting Up a Document Deadline

When you’re creating electronic signature documents, adding a document deadline is very simple. Begin by starting a New Document using the +New button in the Dashboard.
Begin by Uploading a document for signature, and then edit your Recipients. Set any Recipient settings you may want and edit your invitation email message.
Now, on the Editor page, click Settings in the top left next to the Document Title and go to the Notification page.
Edit Document Settings to set Document Deadline
Here, you can set reminder emails, what the final email looks like, copy someone for all the notification emails, and most importantly (for this article), set Document Deadlines. Make sure you also indicate when to warn the signer of the expiration.


By default, documents in Signority expire after 180 days, but you can change this as well. You can learn how to change the default expiration and automatic reminder schedule here.

Monitoring a Document Deadline

After you send out a document, you can view documents that will soon expire in the Document page. Click on the Status header and filter by Documents Expiring Within a Week. Documents shown will be listed as In Progress.
We strongly recommend resending documents and making sure you sent it to the right email if it ever gets to that point. You can also directly contact the signers to remind them in case the automatic reminders are being ignored or lost.

Further Readings

Creating Your Default Signature Design
Customizing Company Branding Settings
Using Page View Evidence for Sensitive Documents

Documents for In-Person Signing

Ever had a situation where the signer is coming to see you in person but still wanted to use electronic signatures? Or maybe they do not have an email? That’s no problem! This document will go over the steps to set up a document for in-person signing to cover for these scenarios!

Creating a Document for In-Person Signing

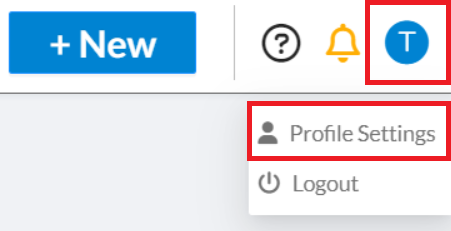
Begin by creating a new document as you normally would, by selecting the +New and selecting New Document. The major difference in the preparation work comes during the recipient page. Check out our page on creating electronic signature documents here to learn the other steps.
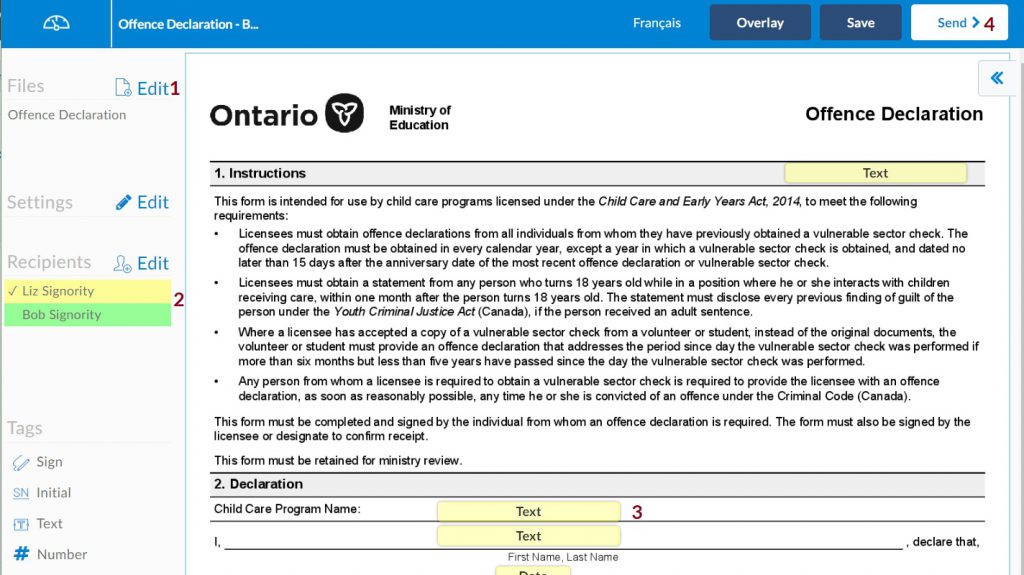
When you get the Recipient page, things will start to differ from the regular document creation process. Begin by adding a recipient (or yourself if you are going to host the in-person signing) using the Add Recipients button. For the person who will host the in-person signing process, change them from a Signer to a Signing Host using the drop-down menu for the roles. An extra icon of a house will appear.

set up your in person signing process
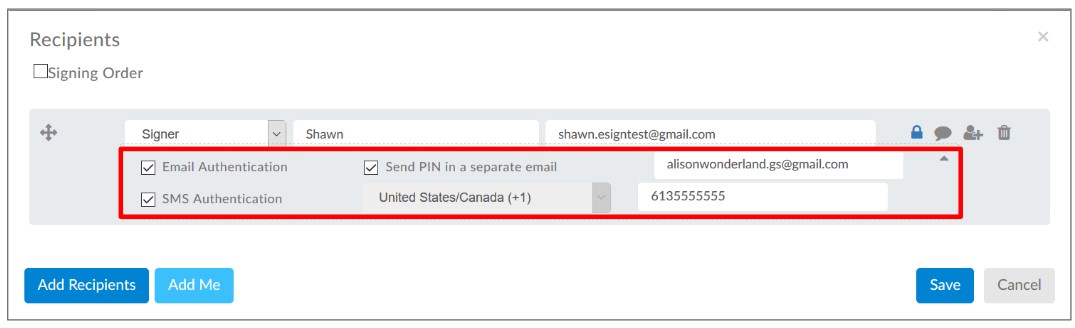
When you select the In-Person Signing option, a second row will appear below the signing host. Enter the In-Person Signer‘s name and email address. You will also want to authenticate these signers. Since the document is not sent through an email, adding an extra level of authentication allows you to validate the In-Person Signer even further.
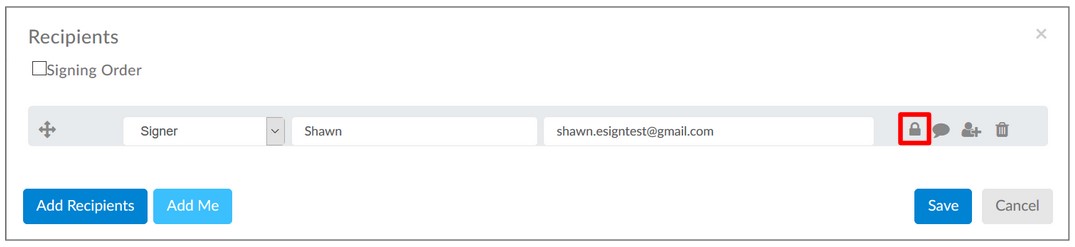
Click on the lock icon next to the In-Person Signer, and when prompted, select the ID Authentication and specify the type of ID you want to use for validation, such as Driver’s License or Passport.
If you need to add more than one in-person signer, you can do so by clicking on the house icon again next to the signing host.
When you’re done, click Save
authenticate your in person signing by requesting ID information

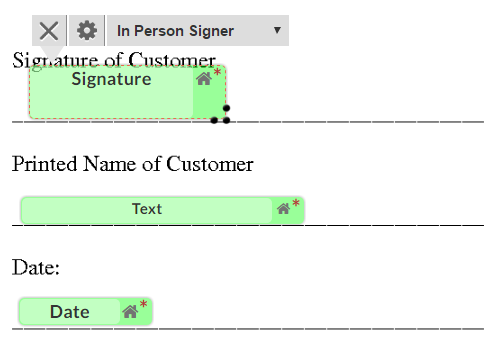
With the recipient list set, finish up any recipient settings you might want and then move to the next step. On the Editor page, drag and drop the tags from the left into place within the document. Assign the tags to the correct signer by clicking on a tag and using the drop down menu to change the recipient. Tags assigned to the in-person signer will have a house icon.
assigning tags for in-person signing
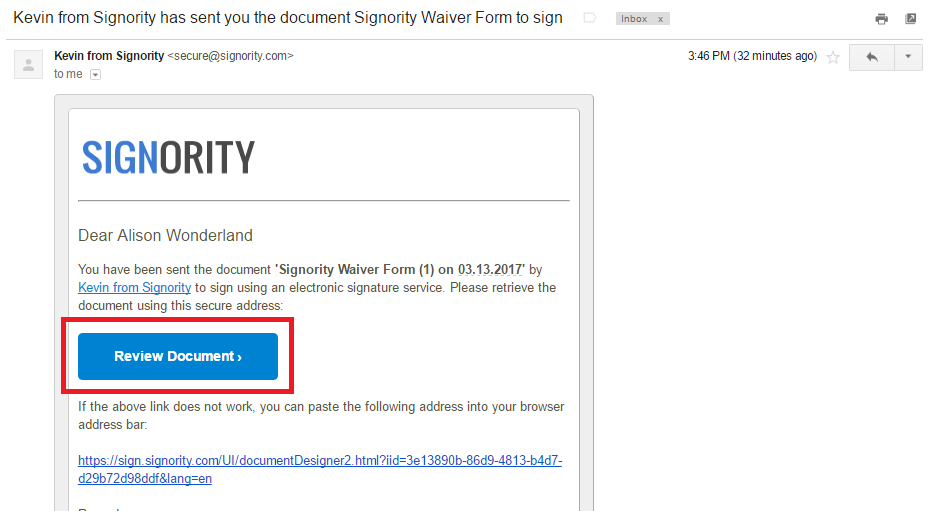
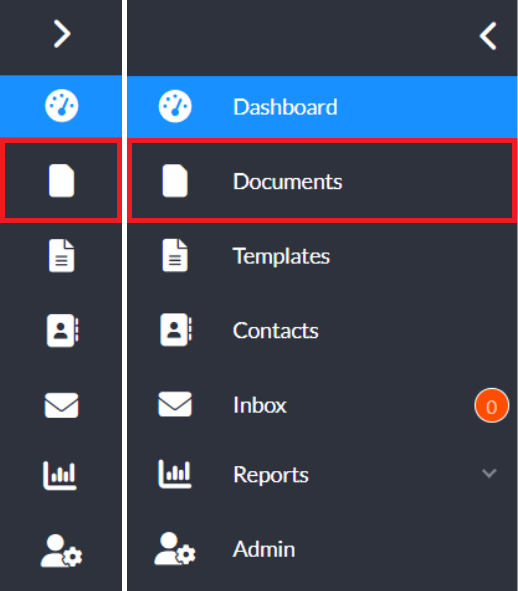
When you’re finished, click Next to finish preparing the document. When it’s time to sign, go to your email and open the invitation email to access the signing page or access the document from your Inbox from the dashboard in the Navigator bar.
Alternatively, you can publish a template link for online signing and save the link in your browser.

Hosting the In-Person Signing

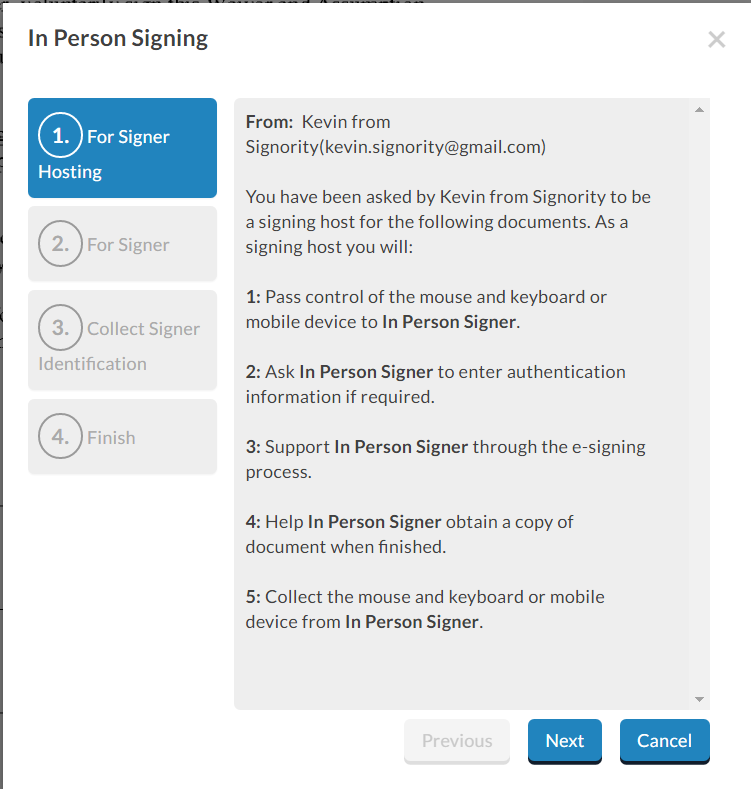
When it’s time to sign a document with In-Person Signers, how you sign documents online is a bit different than for a normal document. The in-person signers will need to authenticate themselves in order to add their signature. The process is very similar to the witness signer authentication process.
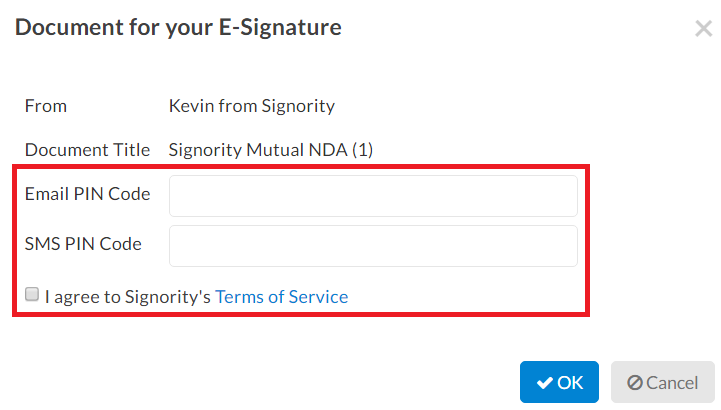
The first thing signers should do is to fill out all the information except for the signature tag. When the remaining tags are filled, select the Signature tag to begin the authentication process.
In-Person Signing Authentication Process
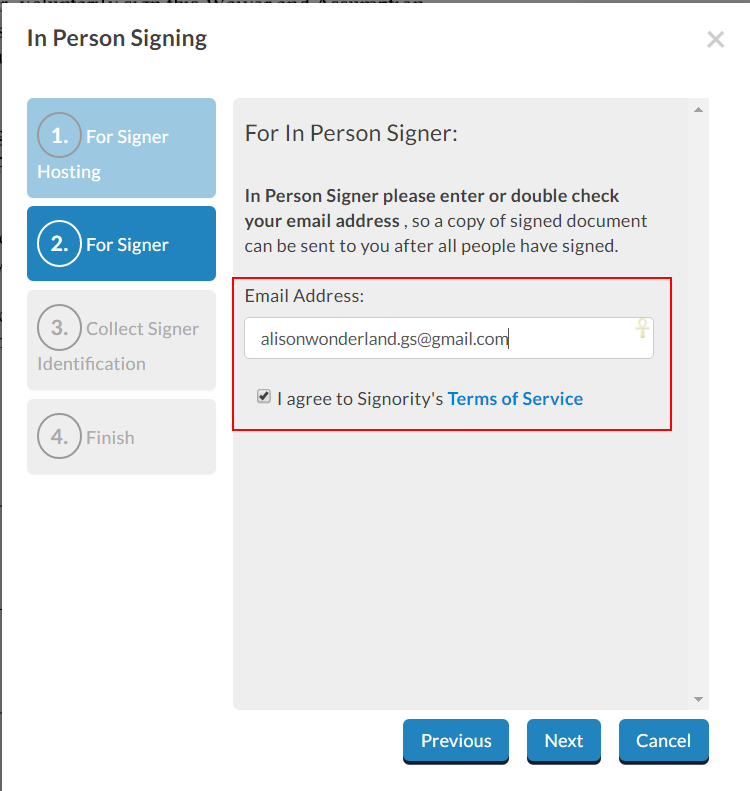
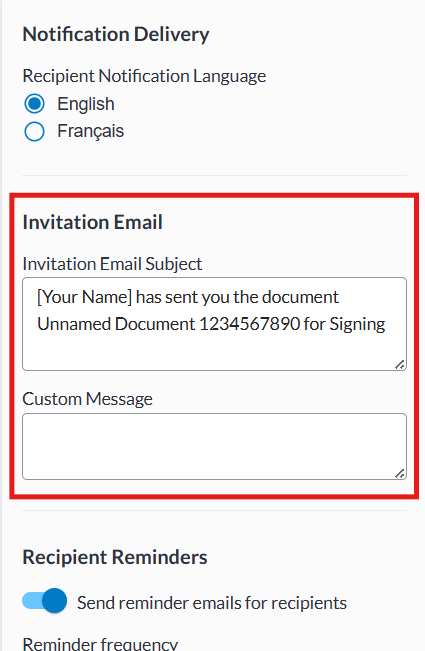
They’ll need to first acknowledge that they are doing an in-person signing and then agree to the terms of service. They’ll also need to put in their email to receive the finalized document. 
In-Person Signing Email Confirmation
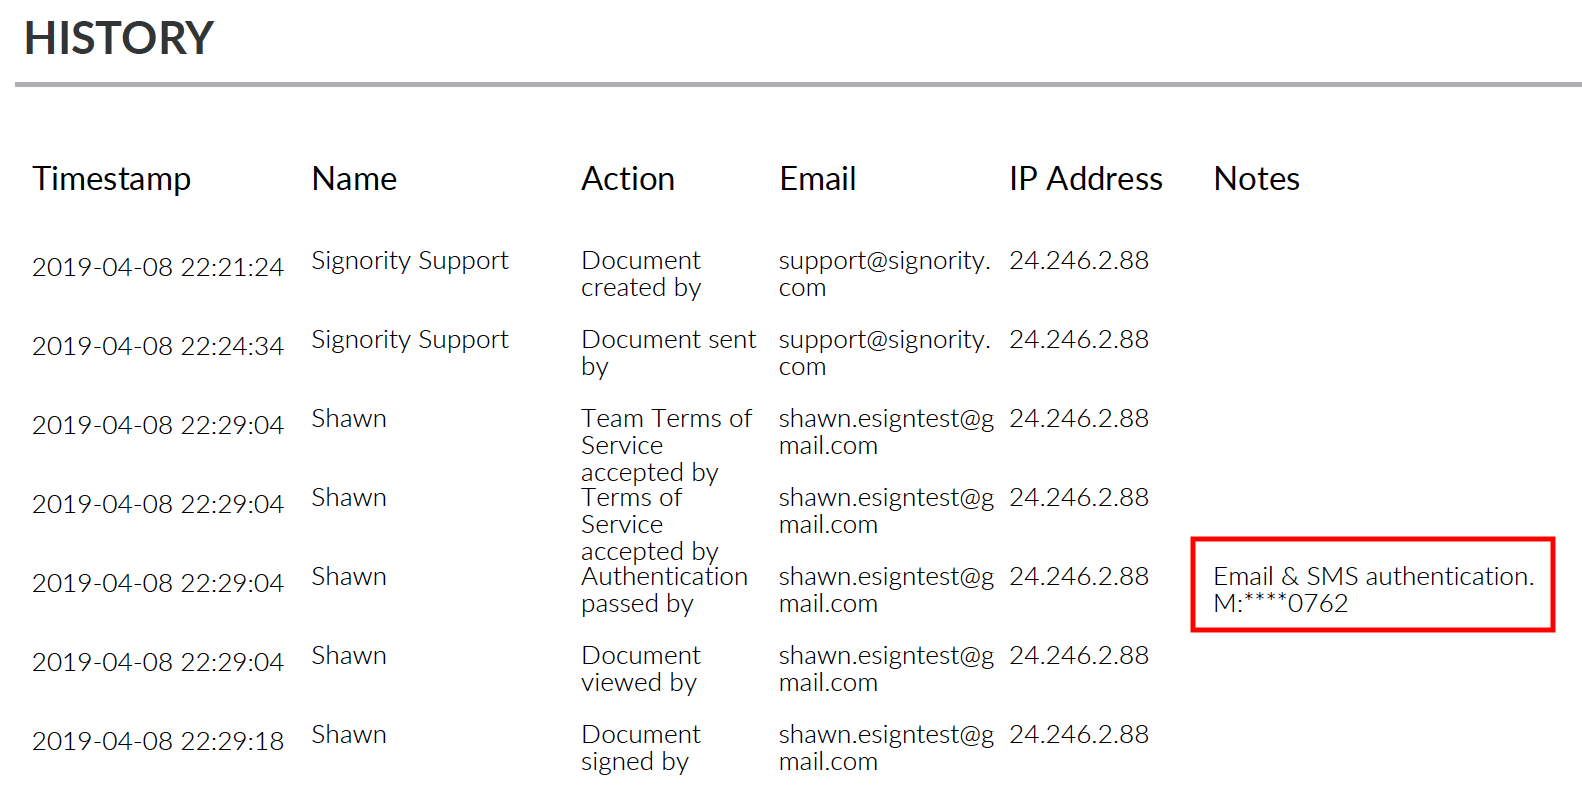
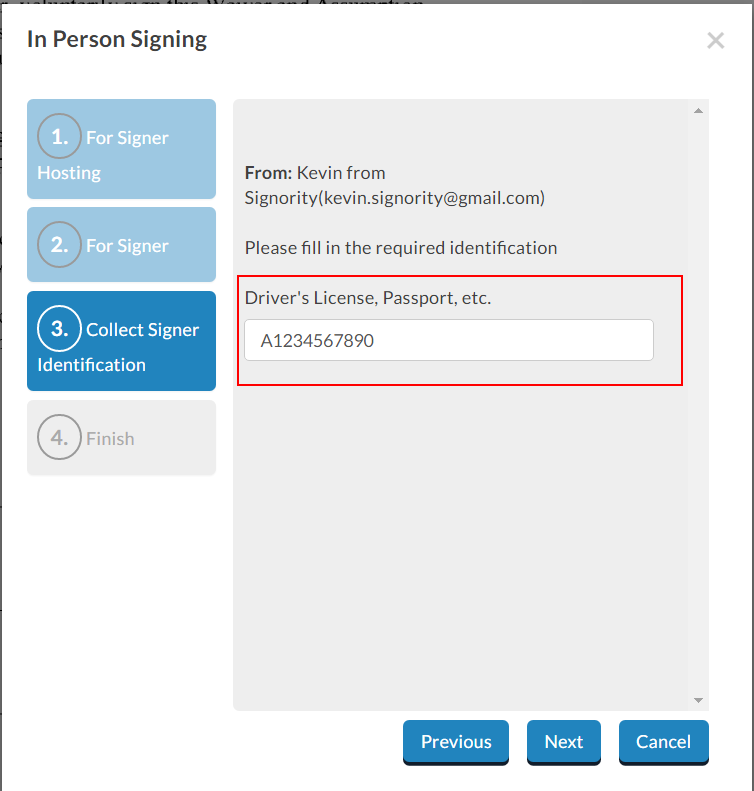
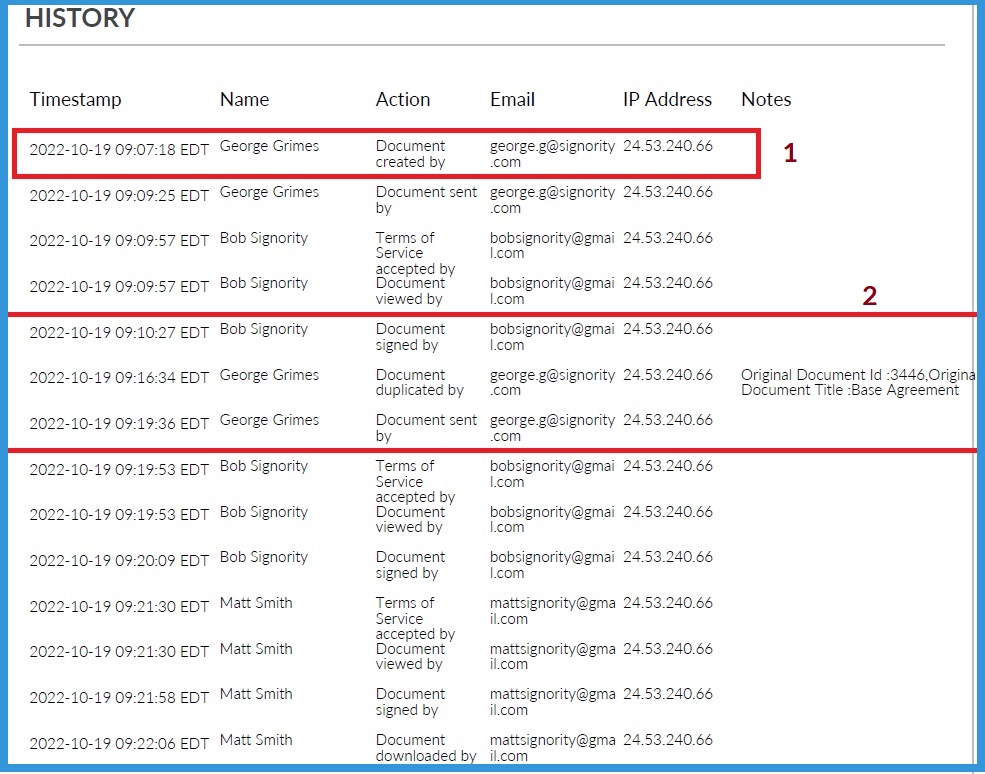
If you’ve set up any ID authentication here, the in-person signer will need to enter the information of the specified ID. This information will be captured in the audit trail as a way of validating the in-person signer’s identity.
In-Person Signing ID Authentication
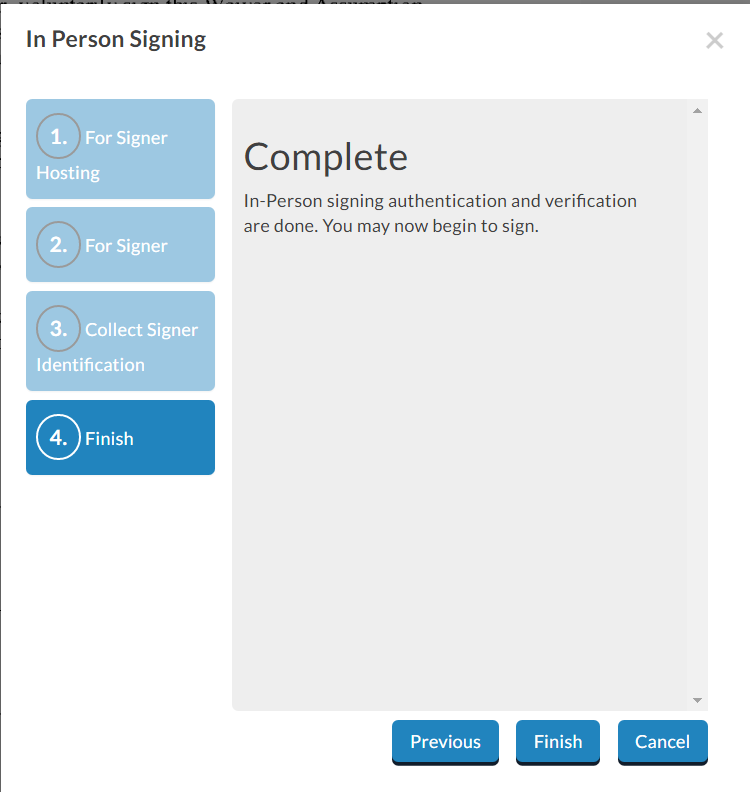
Once they’ve added their ID authentication details (if applicable), they can complete the authentication process. Simply click Finish when you arrive to the last step.
In-person signing authentication complete

When this is done, they will be able to sign and fill in the tags. Repeat this process for each of the in-person signers (if there are more than one) and then complete the rest of the document. Submit the document when it is completed. If there are other non-in-person signers, the document will be completed once all parties have submitted their portion.
The final document will be received by all signers, including the in-person signer, as well as the sender.

Further Readings

Setting Up Documents with Witness Signers
Electronic Signature Authentication using Email and SMS Authentication
Using Page View Evidence for Sensitive Documents

Copy Notification Emails to Record All Signer Interactions

Some deals and workflows require keeping a clear record of all communication with your clients and with automated reminders and notifications, it’s easy for important details to get missed. Signority lets you automatically send copies of document notification emails to any email address you choose, so you can stay organized and keep everything on record.

Preparing a single document with CC notifications

You’ll need to begin by creating a new document (see step-by-step process here) until you arrive at the Editor page. From there, proceed as follows:

  1. Click Settings on the top left next to the document title.
  2. Select the Notifications tab.
  3. Checkmark the “Send a copy of all email notifications to the follow address” option and enter the CC email.Select the send copy option and enter email address
  4. Click Save.

When you’re finished, continue setting up the document as normal, adding tags and assigning them to the correct recipients. When you’re finished, you can send the document.

After you’ve sent the document, you’ll notice in the CC email address there are forwarded copy notification emails, like the invitation for signing. In these emails, you’ll see a message letting you know that it’s a copy sent to which recipient email address. You can save these emails for your record.
Please note that for these emails, the links and attachments are stripped for security reasons. They will not work. These emails are simply just a way to record your interactions and contacts with your signers if it’s necessary for your business.

Copy notification emails

Enable CC notifications by default

Personal Account Default
If you are looking to send a copy of the notifications by default, you can do so under your accounts Profile Settings.
  1. In Signority, navigate to your Profiles Settings by selecting the profile icon on the right of the header.
  2. Select the Notifications tab.
  3. Checkmark the “Send a copy of all email notifications to the follow address” option and enter the CC email.
  4. Click Save.
Team/Organization Default

Billing admins and super admins can setup CC notifications to a specific email by default on the admin console in either team settings for a specific team or in global settings for their entire organization under notifications.

Further Readings

Personalize the Invitation Email with Custom Messaging and Subject Lines
Customize Company Branding for Emails and Signing Pages
Creating a Default Automatic Reminder Schedule

Rejecting Documents As The Signer

As a signer, there can be a multitude of reasons for rejecting documents. The tags could be wrongly assigned or in the wrong location. You could notice an issue with the document itself and some of its content. Signers have the option to reject documents and give reasons for rejection to help improve the next document.

Steps for Rejecting Documents As The Signer

Access your document by using the invitation email in your email inbox. Use the Review Documents button to access the signing page. From the signing page, use the following steps:

  1. Click the More button in the top right and select the Reject option.

Rejecting Documents as Signer from Signing Page

  1. In the window, enter a rejection reason to notify and let the sender know why you don’t approve of the document’s contents. This is important, as the reason will help improve the next document if the document needs to be amended. The reason will be shown in the notification email to the sender.

Reasons for Rejecting Documents
Once the document has been rejected, you should have the document reloaded and no longer have access to tags and fields.

Confirmation for Rejected Document

After a document has been rejected, the sender can go to their Signority account and check the document history and status. In the Recipient List page, you can see the E-Sign Status as Rejected next to the signer rejecting the document.
Recipient Status After Rejecting Document
Alternatively, in the Document History page, there will be an entry with the reason for rejection listed under the Notes column and the Action column will have Document rejected by.
Document History Entry Post Rejecting Document
As the sender, you will also get an email notification confirming the rejected document and information for the reason of rejection. The subject line will also indicate the document has been rejected, in order to quickly determine which document needs attention.
Email confirmation for rejected document
With the reason for rejection, you can resend the document with any changes or create a new document from scratch.

Further Readings

Change Signer Responsibility as a Recipient
Create and Manage a Document Deadline
Copy Notification Emails to Specified Email Address

Switch Signer Responsibilities to Another Person

As a Recipient, there may be times when you need to switch signer responsibility from yourself to another person. Maybe the sender sent the document to the wrong person, or you do not have the authority to sign the document. This can easily be remedied if you access the document and switch signer responsibility by entering the information of the new signer.

How to Switch Signer Responsibility

As the signer, you will need to first access the document by opening your inbox and finding the invitation email from the sender. It should look something like this.
Invitation Email to Access Signing Page
When you access the signing page, go to the top left and under More, select Change Signer.
Switch Signer Responsibility from Signing Page
In the prompted window, switch the name and email to the new signer and then click Change Signer. The page will reload with the document open, but there will be no tags visible to you.
Switch Signer Name and Email
The new signer will now receive an invitation email in their inbox, and your original invitation will no longer be valid. You can click on the Review Document button and view the document itself, but you will not have signing capabilities anymore. The new signer can complete the document and they will receive the finalized document.
If you’re the sender, you can find more information on how to do this process for the signers here. As the sender, you’re able to change the signer responsibilities and information directly from your account.

Further Readings

Rejecting Documents as a Signer
Electronically Signing a Document for Yourself
Customizing Company Branding for Invitation Emails

Changing Signers and Resending Invitation Emails

Mistakes can happen. You may have noticed the document was sent to the wrong signer or entered the wrong email address after you’ve sent the document. Or the signer is unavailable and you need to resend the document to someone else. But don’t worry, changing signers with Signority is easy!
Even if you don’t need to change signers, there are times where the invitation email can get lost. The process to resend an invitation email to a signer is also the same!

Changing Signers for In Progress Documents

Go to the Documents page using the Navigator. Find the document requiring the changing signers and follow these steps:

  1. Click on the name of the recipient on the list to open up the Recipient List page.
  2. In the Recipient List window, click the Change Recipient button. You can also Resend the invitation email to your signers, in case they deleted the original by accident.

Changing Signer or Resending Invitation from Recipient List

  1. Change the name and email of the recipient and click Save & Resend to complete the process. You can also simply resend the invitation by clicking the Save & Resend button without making any changes to the signer’s information.

Changing Signers Info
The document will be sent to the new recipient, and the invitation email to the previous recipient will be invalidated. This allows you to continue with workflows, even with any hiccups or signer issues. After making the changes or resending the invitation, you’ll notice the E-Sign Status turn to Waiting to Open, making it easier for you to track the new workflow.
If you’re not sure how to check and monitor the status of a document, check out our post here.

Further Readings

Resend Documents to Signers
Switch Signer Responsibilities as a Recipient
Rejecting Documents as a Signer

Cancelling & Resending a Document


Sometimes after you have sent a document out for signing and you realize that something was missed.  Either a file wasn’t added, a tag may have been assigned to the wrong signer, or information needs updating. 

With Signority you can Cancel & Resend this document – as long as it is still In Progress

If you need to cancel and resend a document that is in progress:

  1. Click on Documents at the left hand side of the user dashboard.
  2. On the next screen find the document that you want to cancel to resend and check the box beside it (1) and then click Cancel Signing (2).

  3. In the modal window that pops up enter the reason you are cancelling the document in the text area. This reason will be documented in the audit trail.
  4. Click on the dropdown menu, the last two options of the four are used for resending a document.  In both instances the document package will be copied with the workflow, recipients, and all tags as you have placed them in the original document package. 
    Your options, seen in the image below enclosed by a red box, allow you to: 

    1. Copy the document package with content entered by a signer already 
    2. Copy the document package without content that has already been entered by a signer.

      Note:
      Any signatures and/or dates completed will not be copied even if you choose to copy the document package with added content.
  5. Once you have made your selection click Okay.
  6. Once you have selected the okay button you will notice that the original copy of the document package now sits at the top of the list of documents and has a status of ‘Cancelled’. (1) And your new copy of the document package will be the second document listed, with a status of ‘Draft’. (2)
  7. Click on the document that you want to resend. Once it opens you will see that the copy has:
    1. All the same files in the same order (1)
    2. The same workflow and recipients (2)
    3. All your tags placed and assigned as in the original document. (3)
    4. You can now update the document package in any way that you need. Once you have completed the corrections click Send in the upper right. (4)

Note: Your Audit Trail will reflect the  path from the creation of the first document package to the final signature applied to the second copy of the document package.
Notice that the audit trail of both documents is combined into one as shown below:

  1. The creation date/time of the first document sent.
  2. In the second box:
    1. The signature that was applied, 
    2. the time / date the document was cancelled and duplicated, and 
    3. the time/date it was sent out for signature again.

Further Readings

Changing Signers as a Recipient
Rejecting a Document as a Signer
Track and Monitor Document Status & Workflow

Customizing the Invitation Email

Personalize the subject line and message content of your invitation emails to give signers helpful context and increase the chances your email gets noticed and opened.

Customization can apply to all recipients on a document, or to individual signers using a private message.

Looking for organization-wide defaults? See Setting Up Email Branding to configure default email content across your whole organization.

Need to message a specific signer? See Adding Private Messages for Specific Signers to override the general message for an individual recipient.

Custom Invitation Email for All Recipients

You can customize the subject line and message for all recipients from either the Recipients page or the Document Editor, depending on how you start your document.

When Creating a New Document (Recipients Page)

When creating a new document,  you can customize the invitation email on the recipients page. If you missed this step or want to make any changes later in the workflow, you can do so in the document editor.

  1. Click +New on the Dashboard to create a new document.
  2. Upload your files or click Next to skip to the recipients page.
  3. On the Recipients page, find the Invitation Email section on the panel on the right side.
  4. Edit the Subject Line and Message fields to your liking.

When Setting up a Template or Editing a Document (Document Editor)

  1. On the Editor, click Edit next to Settings in the left panel.
  2. You will be brought to the Title and Email tab of the document settings.
  3. Update the subject line or message, then click Save .Edit your invitation email in the Editor page

What the Invitation Email Will Look Like

General invitation email (custom message for all signers)

Invitation email for signers with general message

Note the personalized subject line and the content of the email note.

Further Readings

Setting Up Automated Reminders and Notifications
Custom Company Branding for Your Invitation Emails and Signing Page
Streamline Documents by Creating Templates